Contract items can be highlighted so that customers are able to easily identify those products for which they receive special pricing or contract terms.
Step-by-step guide
To highlight Contract Items:
- As Administrator, go to Settings → Settings (/zSettings.aspx).
- Click the Integration tab.
- Click the Items tab.
- Set the Contract Item source (for 'Display Contract Items First' and 'Contract Items Only' functions) to either:
- Debtor Contract
- Custom Pricing
- To save, click the Update button.
- Go to Accounts → Role Management (/zRoles.aspx).
- Select the required role via radio button.
- Click the Functions tab.
- Click Modify.
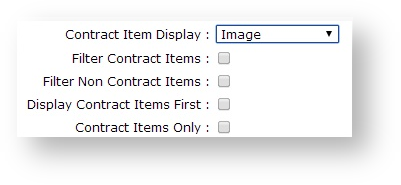
- Set Contract Item Display to either:
- None - no highlighting of contract items.
- Image - displays an image linked to the PRONTO special price rule.
- Set Filter Contract Items. When ticked, a link is placed above the Product Grid enabling users to filter out Non-Contract Items so that only Contract Items are displayed.
- Set Filter Non Contract Items. When ticked, a link is placed above the Product Grid enabling users to filter out Contract Items so that only Non-Contract Items are displayed.
(NOTE - These two flags require a token on the page template in order to render properly. Contact Commerce Vision for assistance.)- If Contract Items are to be listed first in the search results grid and the product category page, set Display Contract Items First.
- To limit products displayed to Contract Items only, set Contract Items Only. (NOTE - This flag can also be set at User level, overriding the system setting.)
- To save, click OK.

If 'Image' is selected as the Contract Item Display method, an image file will need to be uploaded. This will be a small icon used to highlight contract items.
First, upload the image file to 'General Images'.
- Go to Preferences → Upload General Images (/zImages.aspx).
- Click New.
- To browse the image file, click Choose File.
- In ImageDescr, enter an image description.
- Click the Upload button.
Once the image has been uploaded, it can be linked to a PRONTO Custom Pricing code.
- Go to Settings → Settings (/zSettings.aspx).
- Click the Integration tab.
- Click the Items tab.
- Scroll to the Contract Price Codes tab.
- Click New.
- Enter the values as required:
- Code - enter the Pronto Custom Pricing Rule code with which to associate the image.
- ContractType - leave blank (field no longer in use).
- Alt Tag - enter an image description.
- Image - enter the image file name or click the '..' button to search.
- To save, click OK.

Related help