Overview
The Commerce Vision CMS features new layout templates, widgets, and web-based product and category maintenance for sites using Best Practice Design (BPD). It also links to all of the legacy administration pages, such as Settings, Menu Editor, and Preferences.User maintenance in the CMS is split between 2 groups: Website users & CMS users. This article will guide you through creating a new CMS user for your website.
Before creating a new CMS user, it is important that the user has a login with an Administrator role on the Website itself. As long as both logins (CMS & website) use the same email address, the link will be automatic and the user's experience with both interfaces will be seamless. Follow the guide below to create both the Website Administrator and CMS User logins.
Creating the Website Administrator
If the user does not yet have a website login with Administrator role, follow these steps to create one.
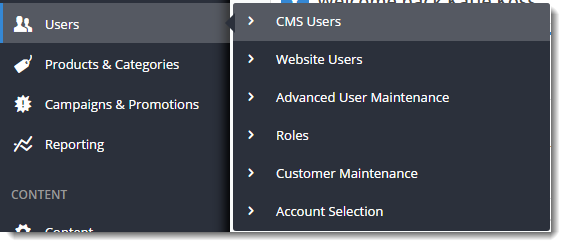
- In the CMS, navigate to Users → Website Users.
- Click Add New User.
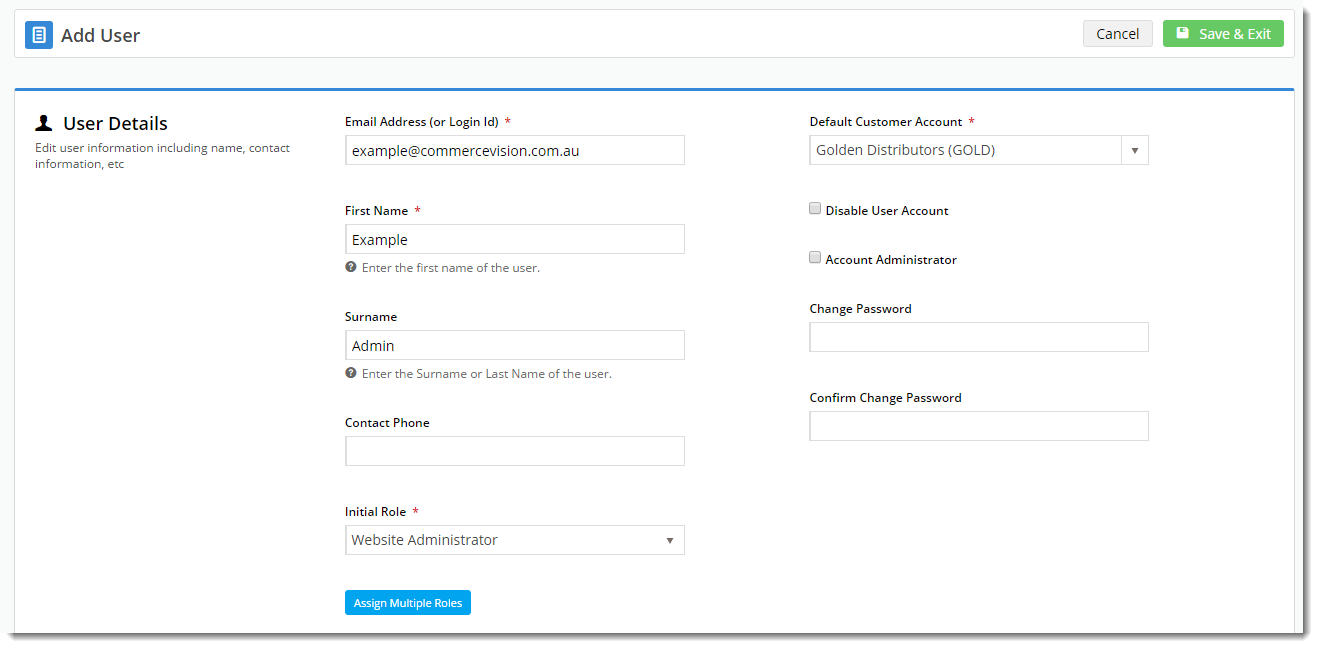
- Enter the user's Name and Email Address.
- Assign a default Customer account.
- Set the Initial Role to 'Website Administrator'.
- Click Save & Exit.
Important Tip
Have the user login to the website with their Administrator credentials before attempting the first CMS login. This is so that access can be validated and legacy pages will load correctly once the user logs into the CMS.
Creating the CMS User
Once the user exists as an Adminstrator on the web (and they have logged in to verify access), you can create their CMS login.
- In the CMS, navigate to Users → CMS Users.
- Click Add New User.
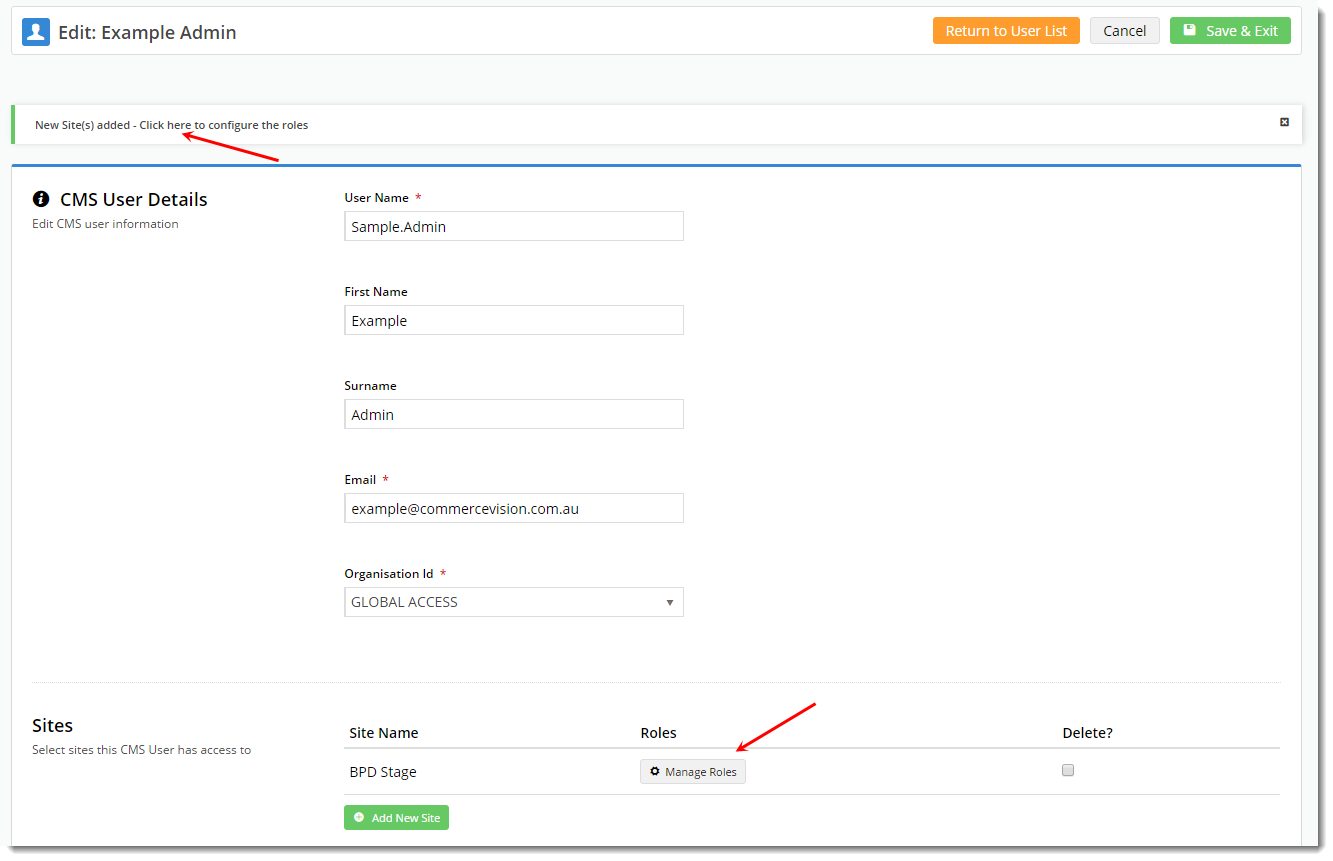
- Populate all required fields, ensuring that:
- User Name does not contain spaces or special characters.
- Email is the same address as the user's website login (refer to Step 3 in Website Administrator user creation above).
- The Organisation ID field should be pre-filled with your organisation name. There is no need to edit.
- Click Add New Site and select the website from the Site Name drop-down list.
- If the user will require access to multiple sites (e.g. Live and Stage), repeat this step.
- Remember, the user will need an Administrator login on each website you add here.
- Click Save & Exit.
- Click either the confirmation message or the 'Manage Roles' button to configure the user's CMS roles.
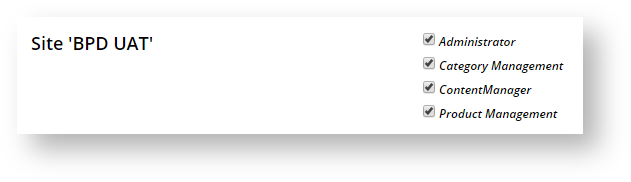
- Tick 'Administrator' and any other applicable roles, and click Save.

Related articles