Overview
Step-by-step guide for Users
If you have access to Report Subscription, you can add subscriptions for your generated reports.
Create a new report subscription
- Login to your website and click Dashboard.
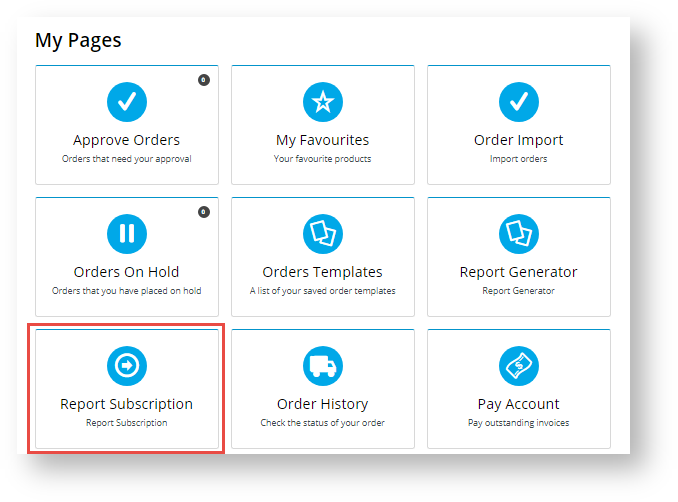
- On your 'Dashboard', scroll down to the 'My Pages' section and click Report Subscription.
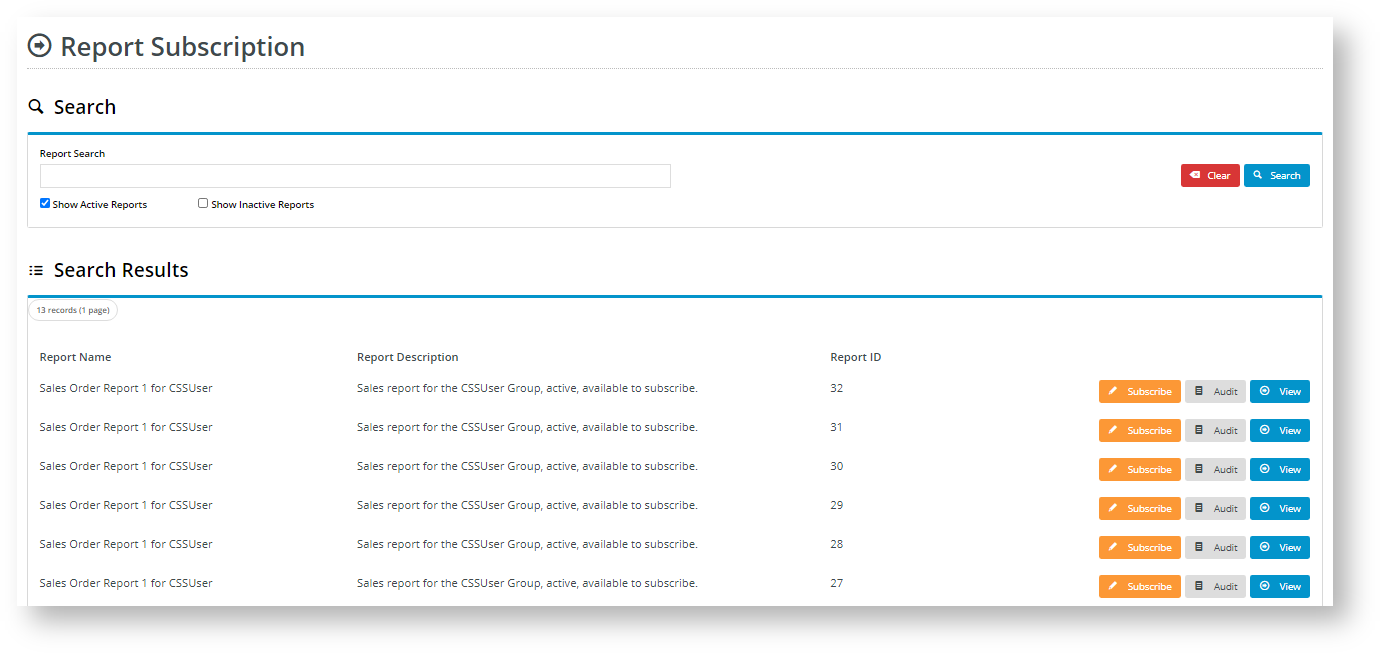
In the 'Report Subscription' list, you can scroll down the list of reports available or search for it. Note - Tick 'Show Inactive Reports' and click Search to display inactive reports as well.
You can only subscribe to generated reports based on original reports that have been enabled for subscription. If the list is empty, there are no reports you can subscribe to. (See your website Administrator for assistance.)
- Click Subscribe for the report. The Manage Subscriptions panel for the report is displayed. Any current subscriptions will be displayed.
- To create a new subscription, click the New Subscription button.
- In Recipient Email Address, enter one or more recipient email addresses for this subscription. If there are more than one recipient, use a semi-colon ';' to separate each email address.
- In the Start Date and End Date fields, enter the beginning and end dates for the subscription period.
- In Frequency, select how often an updated report will be run and emailed: 'Daily', 'Weekly' or 'Monthly'.
- The Active checkbox lets you pause/continue a subscription. It is ticked by default when a subscription is created. If you do not want the subscription to run after creating it, untick Active. You can tick it any time after the subscription has been created.
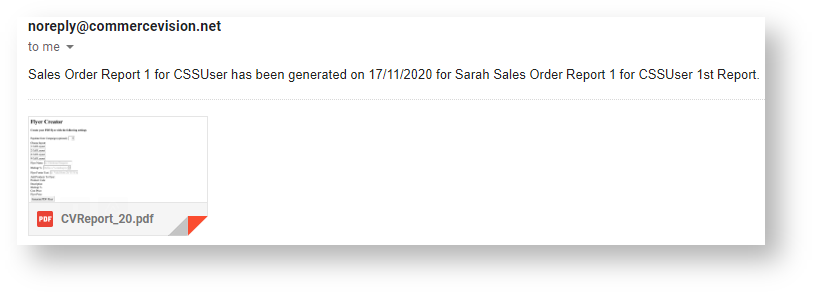
To save the subscription, click Add. If the subscription is active, recipients will be sent an email with the report attached based on the start date/end date and frequency.
Test report subscription email
You can test that your report subscription has been set up correctly by entering your email address as 'Recipient Email Address' and setting the date to today and time to a few minutes into the future. Check that you receive an email with the report. The Subject line displays the text Admin entered for 'Email Subject' when the report was created.
If you do not receive the email:
- check your Junk Email folder
- check you have entered your email address correctly


Manage Report Subscriptions
View/edit a current subscription
To display the details of an existing subscription,
- Find the report and click Subscribe. Details of any current subscriptions and when an email was last sent are displayed.
- (i) To remove the subscription from the system, click Delete.
(ii) To edit the details of the subscription, change any information in the fields and click Update. If you have changed any information and do not want to save it, click Cancel Subscriptions to revert to existing details and close the 'Manage Subscriptions' panel.
(iii) To pause the scheduled emailing of the report, untick the 'Active' checkbox and click Update.

View Subscription Log of sent events
To view the log of a report's subscription send activity, click the Audit button.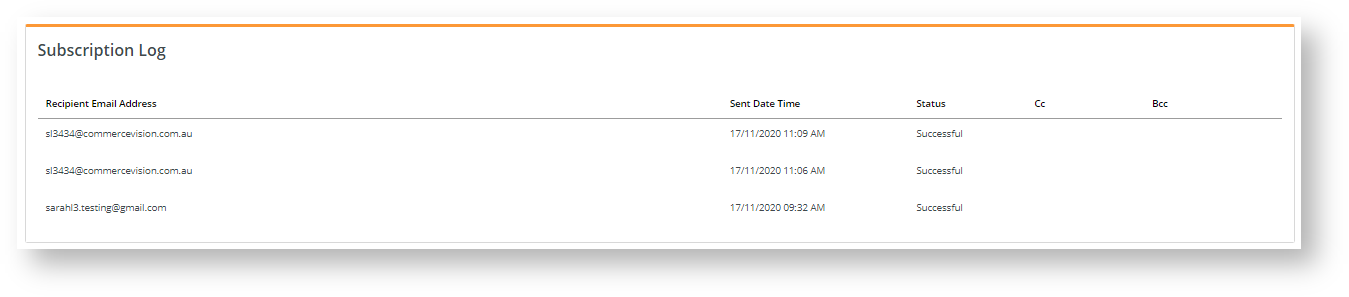
The log provides details of each email sent event. Note - In 'Status', 'Successful' refers to a successful email sending event by the system.
View a report
In case you want to view a report for any reason, e.g., check it is the right one to subscribe to, click the View button next to the report. The system will automatically download the report to your device.
Delete a report
You can delete a report you generated through Report Generator. Only reports that have no current subscriptions can be deleted.
To delete a report,
- Click the Delete Report button.
- Confirm you want to delete the report in the popup message. Click Yes to complete the deletion or No to cancel it.
Additional Information
| Minimum Version Requirements | 4.23 |
|---|---|
| Prerequisites | A report must be enabled for subscription. |
| Self Configurable | No |
| Business Function | Reporting |
| BPD Only? | Yes |
| B2B/B2C/Both | Both |
| Ballpark Hours From CV (if opting for CV to complete self config component) | Contact Commerce Vision |
| Ballpark Hours From CV (in addition to any self config required) | Contact Commerce Vision |
| Third Party Costs | n/a |
| CMS Category | Reporting |
Related Help