Overview
Afterpay is a popular Buy Now, Pay Later option that Commerce Vision supports for BPD. Your customers can get their goods now, and pay for them over time in manageable installments. Configuring Afterpay for your website is quick and easy, provided you have already established a merchant account with Afterpay. For further information see our comparison page, or visit Afterpay at https://www.afterpay.com/en-AU.
Prerequisite alert!
Before you can begin offering Afterpay to your customers, your website must be running version 4.08+, and you'll need a merchant account with Afterpay. Contact our support team if you'd like to request a version upgrade for your site, or to be put in touch with our Afterpay account manager.
Step-by-step guide
- Before you start, have your Afterpay account credentials handy.
- In the CMS, navigate to Settings → Feature Management.
- Search for Buy Now, Pay Later, or select the Payment & Checkout tab.
- Click 'Configure' on the Buy Now, Pay Later feature. (If no Configure option is visible, click the 'Contact to Enable' button and our support team will be notified of your request.)
- Scroll to the Afterpay configuration settings section.
Set the Mode based on whether you're configuring Afterpay for your Live site (Production), or Stage site (Sandbox).
Enter your Merchant IDs and Secret Key in the relevant fields (Production or Sandbox).
- Set the following options:
- Event Logging - toggle this ON (recommended).
- Auto-Integrate Pending Orders - integrates the orders to the ERP prior to receiving a response from Afterpay.
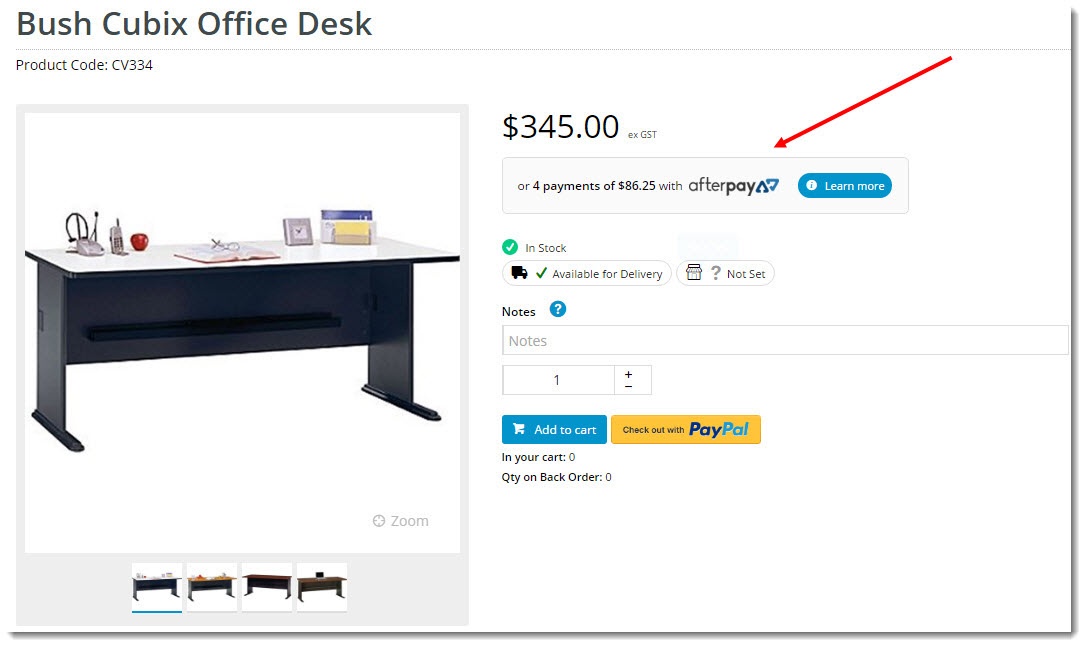
- Display Content in Product Detail - toggle on to show the Afterpay logo & info on the product detail page, which launches a pop-up explaining the payment option.
- Once all settings have been configured and you're ready to go, scroll back to the top, set the Afterpay status dropdown to Enabled, and Save.
Some other Buy Now, Pay Later payment providers ask that you specify the order and product $ values required to trigger their payment option at checkout. With Afterpay however, these values are set automatically, based on the terms of your merchant account and the user's borrowing power.
About Overrides
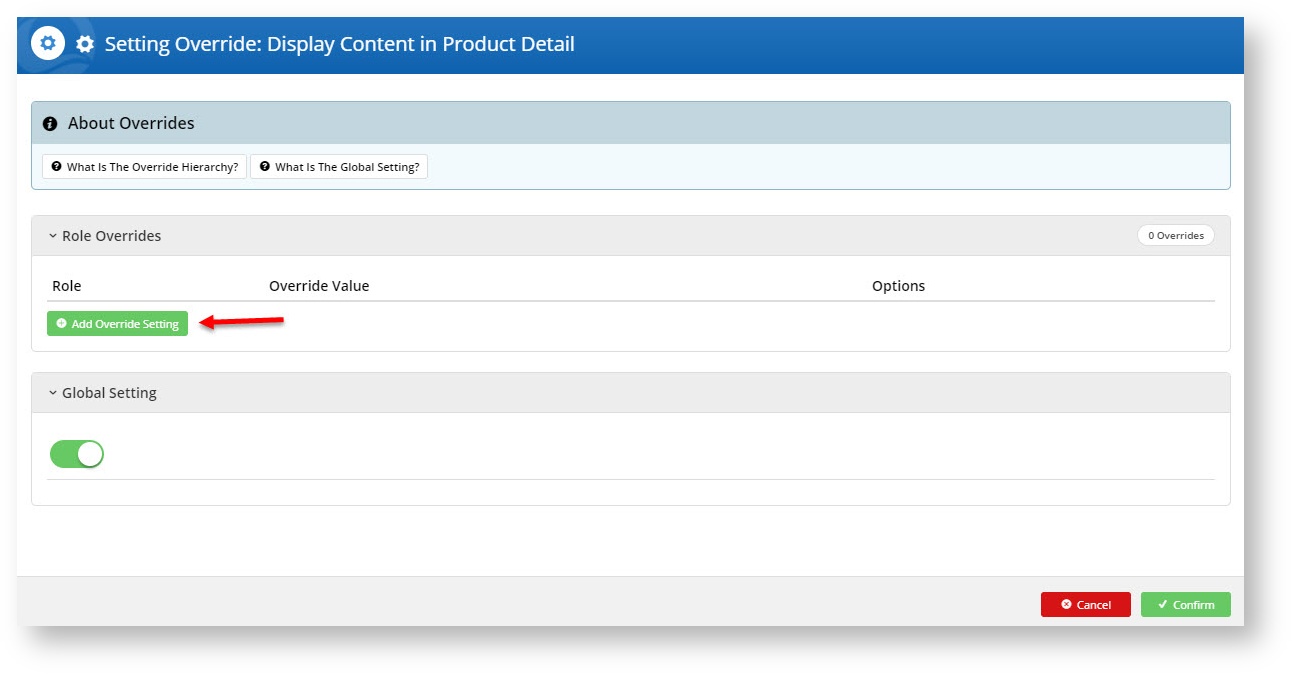
You can override any of the feature settings based on the user's role.
For example, you may wish to display the Afterpay info box on the Product Detail page for B2C users, but not for B2B. In this case, you could set an override.
- Select the 'Overrides' icon next to the setting you want to customise.
- A popup will open, with your current Global setting displayed at the bottom. Click Add Override Setting in the Role Overrides section.
- Enter the role name into the lookup and select the role from the options presented.
- Set the role override value for this setting.
- Repeat steps 2-4 if you wish to override the global behaviour for other roles.
- Click Confirm to close the window.
- Don't forget to click Save on the feature settings page to save your changes!
Additional Information
| Minimum Version Requirements |
|
|---|---|
| Prerequisites |
|
| Self Configurable |
|
| Business Function |
|
| BPD Only? |
|
| B2B/B2C/Both |
|
| Ballpark Hours From CV (if opting for CV to complete self config component) |
|
| Ballpark Hours From CV (in addition to any self config required) |
|
| Third Party Costs |
|
| CMS Category |
|
Related help
Related widgets


