Product Metadata can be configured in PRONTO Web Maintenance for use on the website. There are four main steps:
- Specify the Metadata Table (indicates where metadata will be stored in the database)
- Create Metadata Codes (feature types, e.g. Colour, Size, Material)
- Create Metadata Values (features assigned at product level, e.g. Green, 1800mmL, Aluminium)
- Assign Metadata to Products
Step-by-step guides
1. Specify the Metadata Table:
- Login to PRONTO.
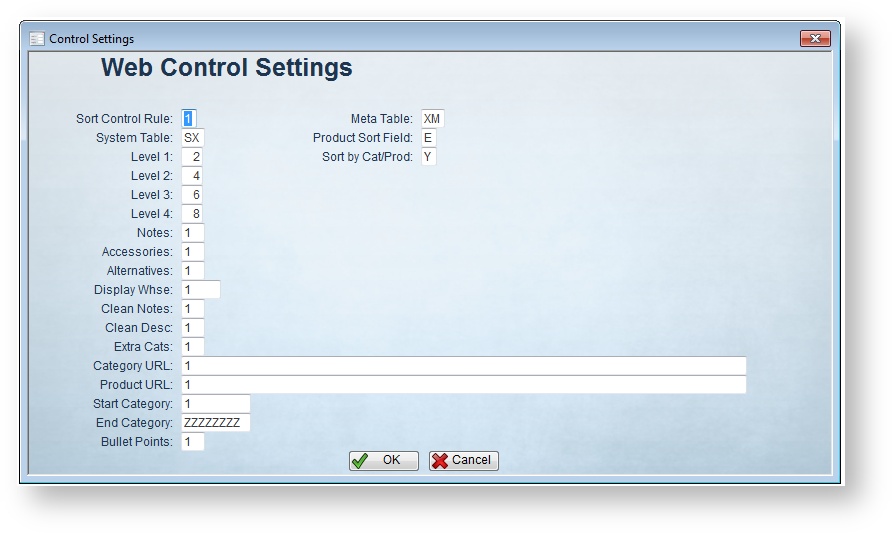
- Navigate to 'Web Site Category / Product Maintenance' --> 'Control Settings'.
- Update the 'Meta Table' field with the Metadata Table code (generally 'XM').
- Click 'OK' to save.
2. Create Metadata Codes:
- Login to PRONTO.
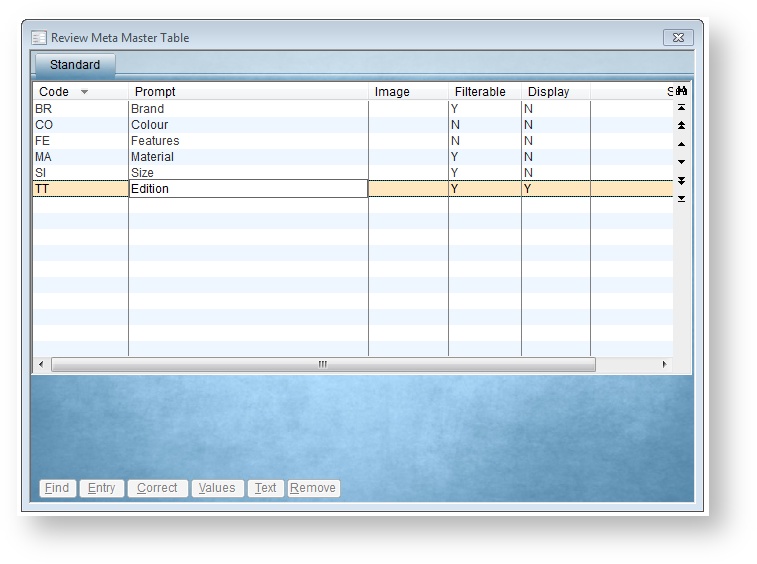
- Navigate to 'Web Site Category / Product Maintenance' --> 'Metadata'.
- Click 'Entry'.
- Enter a 2-character value in the 'Code' field (identifier in the XM Table).
- Enter a description in the 'Prompt' field (this is what users will see).
- Enter an image reference in the 'Image' field if required, otherwise Enter/Tab to next field.
- Enter a value in the 'Filterable' field:
- Y - Users can filter on this metadata type
- N - Users can not filter on this metadata type
- Enter a value in the 'Display' field:
- Y - Display this metadata type on the web
- N - Integrate, but do not display this metadata type on the web
- Assign a sequence value in the 'Sort' field (this determines the order in which the Metadata types will appear on the website).
- Enter a 'V' in the 'Validation' field (metadata 'values') and hit Enter/Tab.
- Hit 'Esc' to leave Code entry mode.
3. Create Metadata Values:
- Login to PRONTO.
- Navigate to 'Web Site Category / Product Maintenance' --> 'Metadata'.
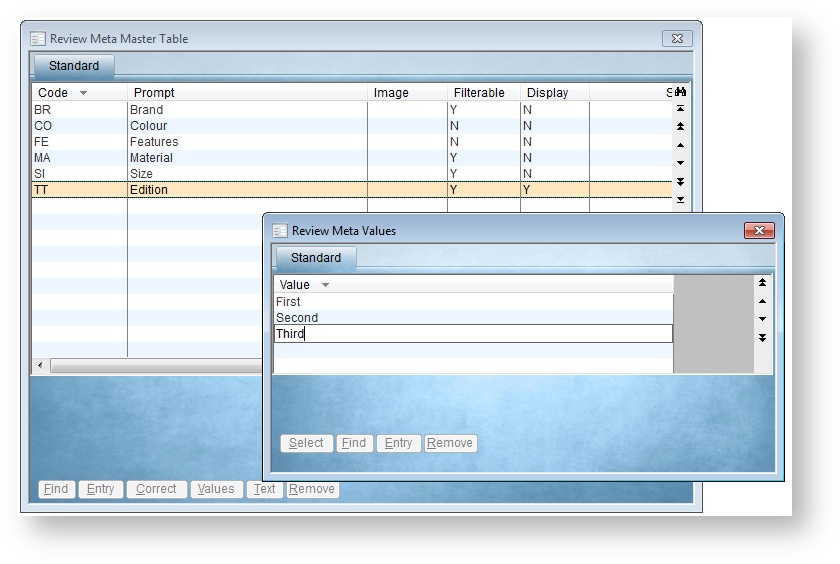
- Highlight the required metadata code to which values will be added.
- Click 'Values'.
- Click 'Entry'.
- Enter a value description.
- Use Enter/Tab to proceed to the next entry line.
- Enter the next value.
- Repeat Steps 6 - 8 as required.
- Hit 'Esc' to leave Values entry mode.
Metadata Values cannot be corrected. If, during creation of a new Metadata Value, a typo occurs, it is best to remove the incorrect item and re-enter it.
4. Assign Metadata to Products by Stockcode:
- Login to PRONTO.
- Navigate to 'Web Site Category / Product Maintenance' --> 'Stockcode Review'.
- Search for the required product.
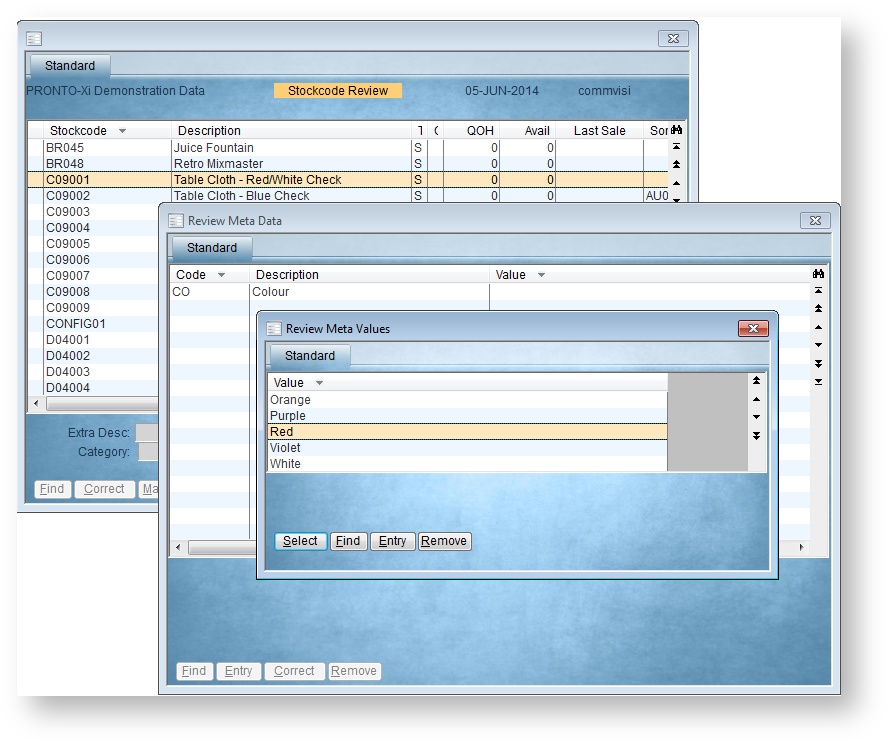
- With the product highlighted, click 'Meta'.
- Click 'Entry'.
- Enter the Metadata Code, or click the magnifying glass / hit 'F2' to search.
- A new window will appear with the available values; highlight the required value and click 'Select'.
- Repeat Steps 6 & 7 as required.
From PRONTO version 1.56+, you can also maintain Metadata via import, pasting the data from a spreadsheet.
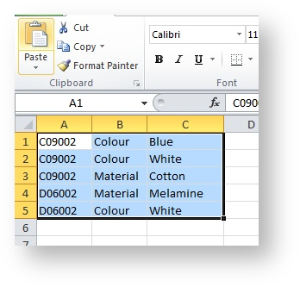
- Populate a spreadsheet with metadata in the format: Stockcode, Meta Code / Description, Meta Value (no header row).
- Highlight and Copy all data on the spreadsheet.
- Login to PRONTO.
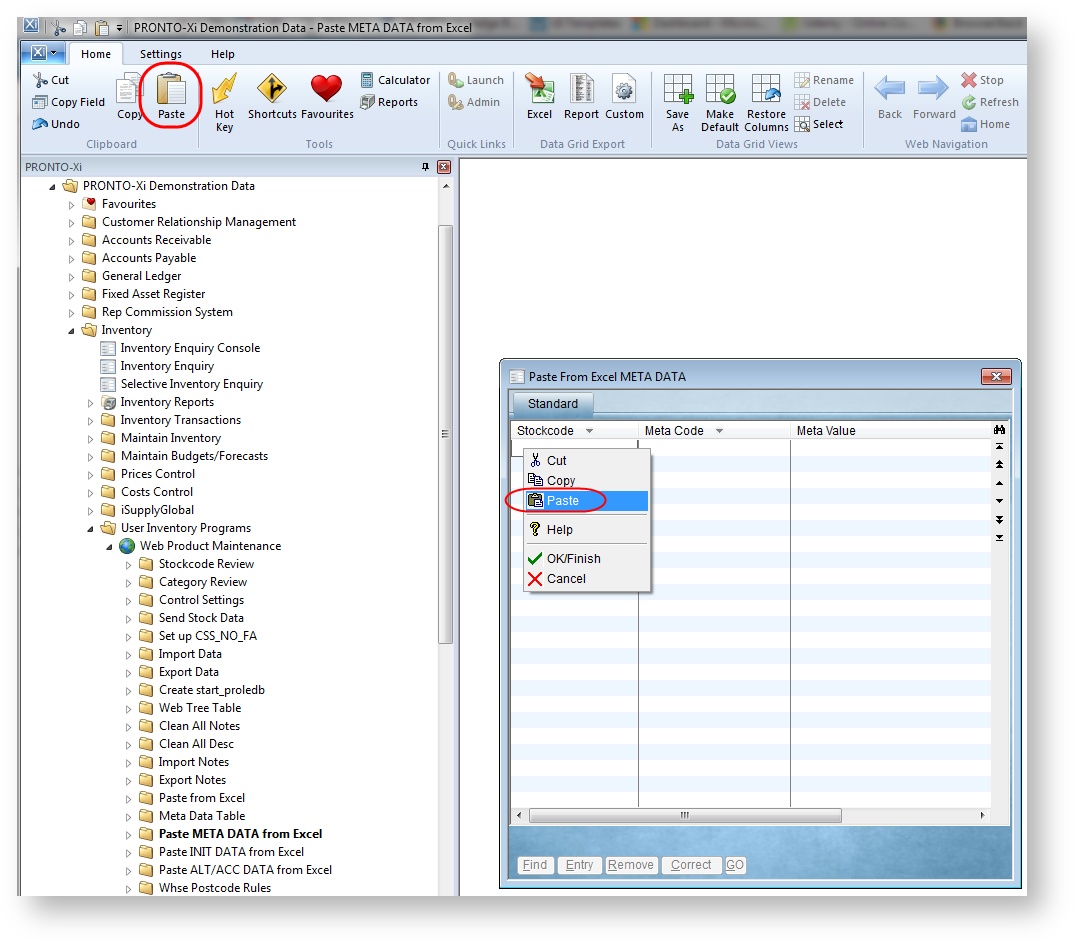
- Navigate to Web Site Category / Product Maintenance → Metadata → Paste META DATA from Excel.
- Click Entry.
- Paste the copied data into Pronto by click the Paste clipboard icon on the top menu, or by right-clicking and selecting Paste.
- Verify that data has pasted correctly.
- Hit Esc to leave data entry mode.
- Click GO to process the import.
- Confirm by clicking Yes / using 'Y' key.
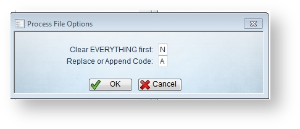
- Specify whether to clear ALL existing data first (default is NO).
- Specify whether to overwrite or append existing metadata:
- R - replace/overwrite (any existing metadata for pasted codes will be cleared and replaced with data in the import).
- A - append (any existing metadata for pasted codes will remain intact and data in the import will be added).
- Click OK to proceed.
- A confirmation message will be displayed once data has been processed.
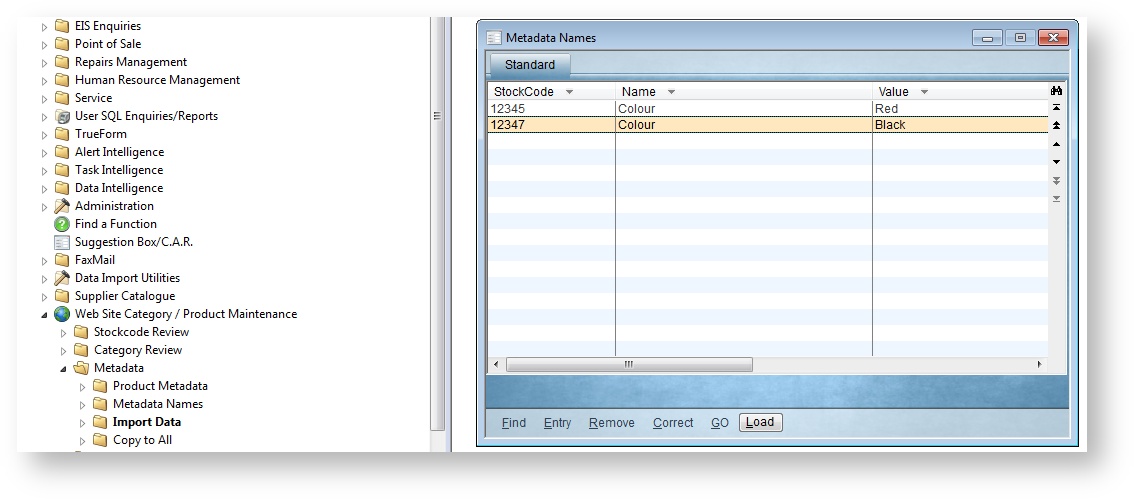
To import very large amounts of Metadata, it may be more efficient to save the spreadsheet as a .csv file, rather than performing a Copy & Paste:
- Save the spreadsheet as 'metafile.csv' in PRONTO's /tmp folder.
- Navigate to 'Web Site Category / Product Maintenance' --> 'Metadata' --> 'Import Data'.
- Click 'Load'. Data from the .csv file will be pasted.
- Verify the data has pasted correctly.
- Click 'GO' to process the import.
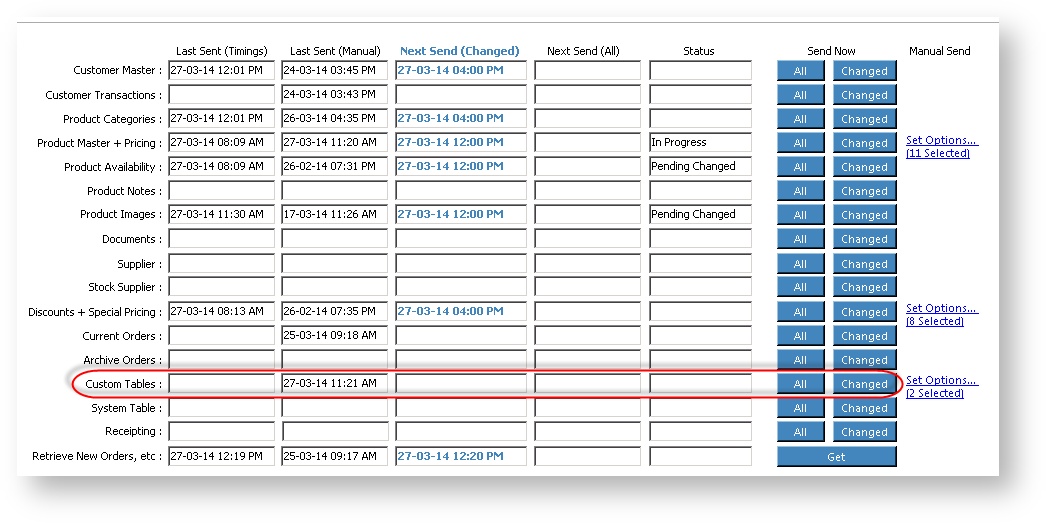
To Integrate Metadata to the web, send 'Custom Tables':
Related articles
