Customer Experience
1. On the cart or checkout page, the customer clicks the Request Quote button. (Where the button appears depends on where on the page the widget has been added to the cart.)
On the cart page
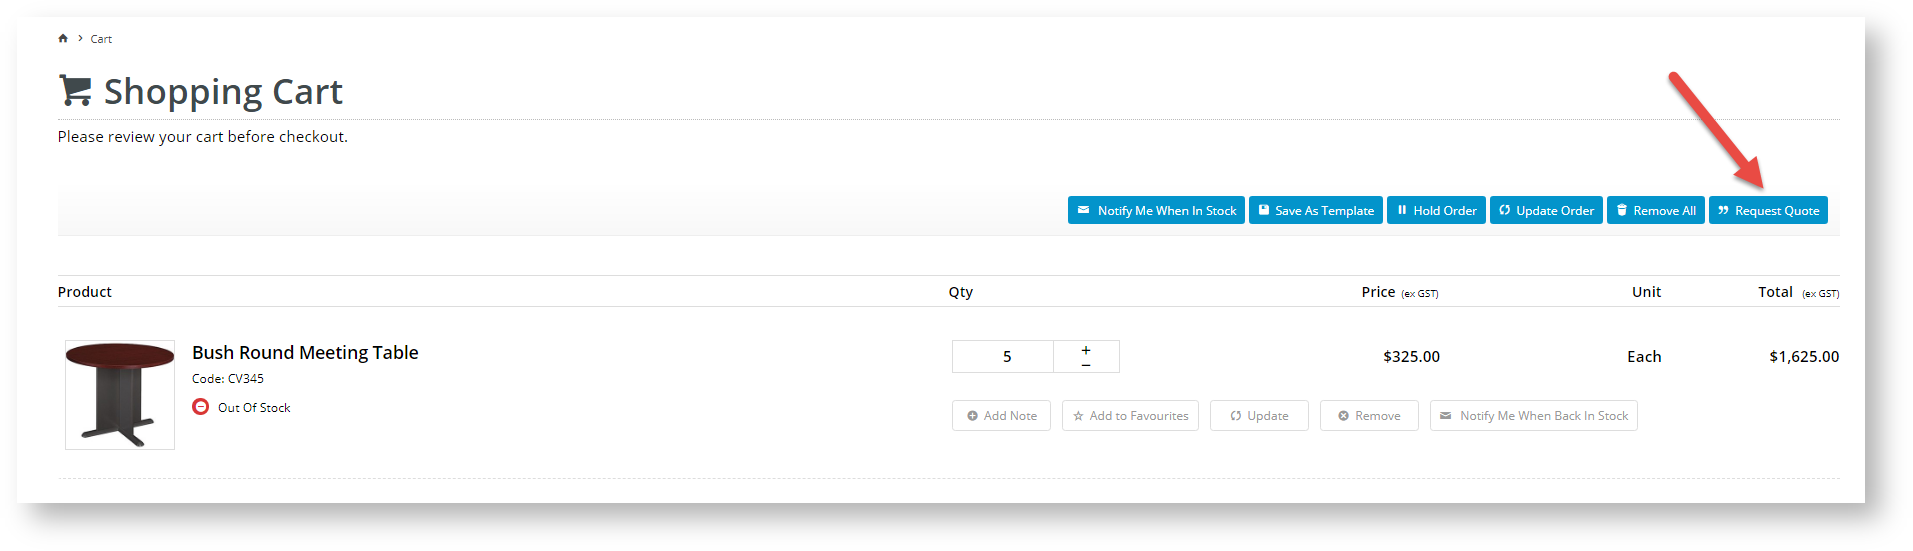
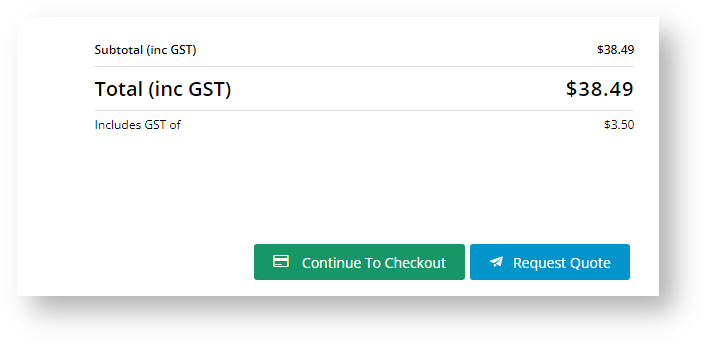

2. The customer clicks Request Quote to process cart contents as a quote instead of an order.
3. The customer receives a 'Quote Confirmation' email. The internal notification recipient added will also receive a 'Quote Submitted' email.
| Email: Quote Confirmation email | Example: Quote Submitted email |
|---|---|
|
|

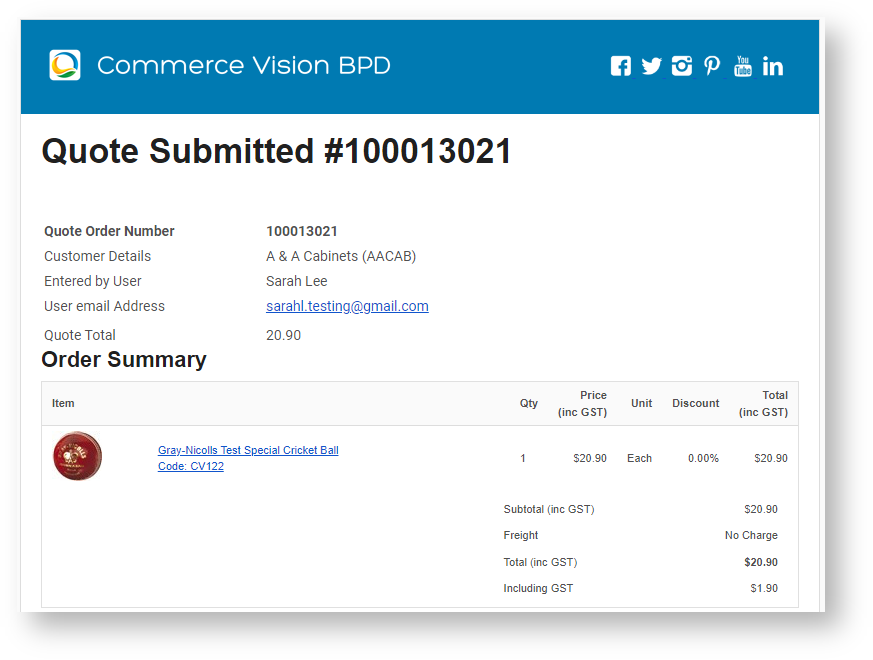
The quotation request is loaded into your ERP, e.g., PRONTO, with the quotation status: '02'. In the ERP, your Sales Rep and Customer Service team can easily identify the items on the quote, check cost (and margin), etc. After any price adjustments, the team converts the quote to a Sales Order directly in your ERP. This is re-integrated online.
4. The customer is emailed about the re-integrated quote. They can access it for further action on Quote Review page.
View Quotes in Order History
Your customer can also view and review the quote details from the Order History page. NOTE - They may need to enter the quote's invoice number in the Invoice/Order Number field.

Configure Standard Quote mode
This guide assumes Commerce Vision has enabled the Standard mode for your website.
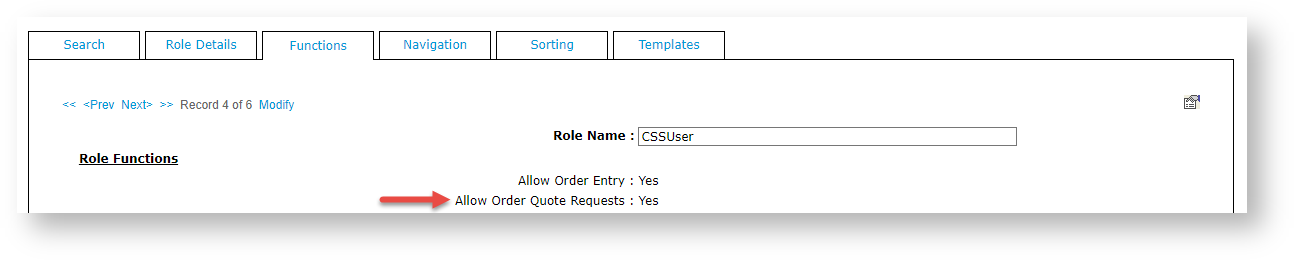
1. Enable Request Quote for a Role
Regardless of quote mode implemented for your site, quoting must be enabled for every Role that should have this functionality.
- In the CMS, go to Users → Roles.
- Select the Role you'd like to update (e.g. 'CSSUser'). The page will immediately refresh to display role details.
- Select the Functions tab and click Modify.
- Set Allow Order Quote Requests to Yes.
- Click OK to save.
2. Set Order Quoting Mode to Standard
| Info |
|---|
Quote requests with the standard quote mode will not include shipping charges. If this is required in quote calculations, please contact Commerce Vision for assistance. |
- In the CMS, go to Settings → Feature Management → Payment & Checkout.
- Scroll down to Quotes and ensure it is toggled ON.

- Click Configure.
- In Quote Mode Selection, select 'Standard'. (NOTE - While there are other options in the lookup, each must be implemented by Commerce Vision to work on your site.)
- Click Save or Save & Exit.

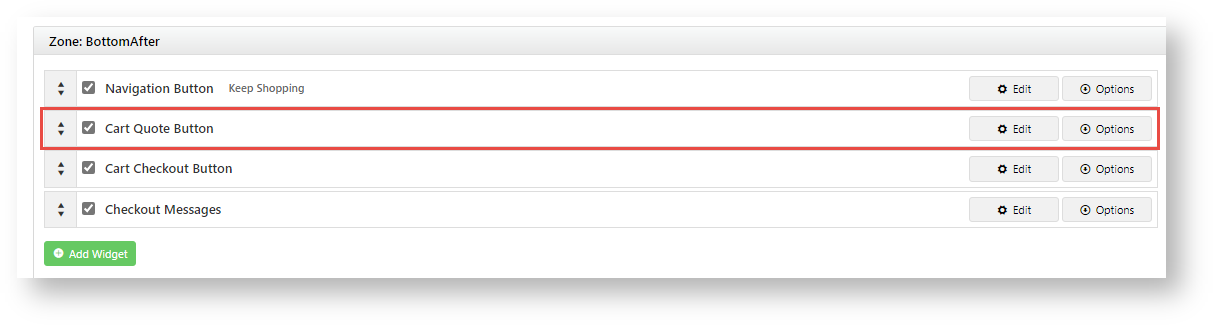
3. Add Cart Quote Button Widget
This widget renders the Quote Request button. (It may have been added during implementation.)
- In the CMS, go to Content → Pages & Templates → Checkout → Cart.
- In the zone the button is to display, click Add Widget.
- Find the Cart Quote Button Widget, then click Add Widget.
- Edit options. See: Cart Quote Button Widget.
- Click Save. TIP - You can drag and drop the widget to another position in the zone.
4. Configure the Quote Confirmation Email (optional)
- In the CMS, go to Content → Emails.
- Search for 'quote' to view these templates:
- Quote Confirmation - the email the customer receives when they submit a quote request
- Standard Quote Submitted - the internal alert about the new quote request sent to the nominated staff email address
- Select the Quote Confirmation Email template.
- Edit existing widgets or add new a one. In the example below, a Static Content Widget was added to display the 'thank you' subtitle text.


Additional Information
| Minimum Version Requirements |
| |||||
|---|---|---|---|---|---|---|
| Prerequisites |
| |||||
| Self Configurable |
| |||||
| Business Function |
| |||||
| BPD Only? |
| |||||
| B2B/B2C/Both |
| |||||
| Third Party Costs |
|
Related help
| Content by Label | ||||||||||||||||||||
|---|---|---|---|---|---|---|---|---|---|---|---|---|---|---|---|---|---|---|---|---|
|
| Content by Label | ||||||||||||||||||||||
|---|---|---|---|---|---|---|---|---|---|---|---|---|---|---|---|---|---|---|---|---|---|---|
|