Overview
Product images can be tagged in the CMS so that the image in the gallery changes on selection of a product variant.
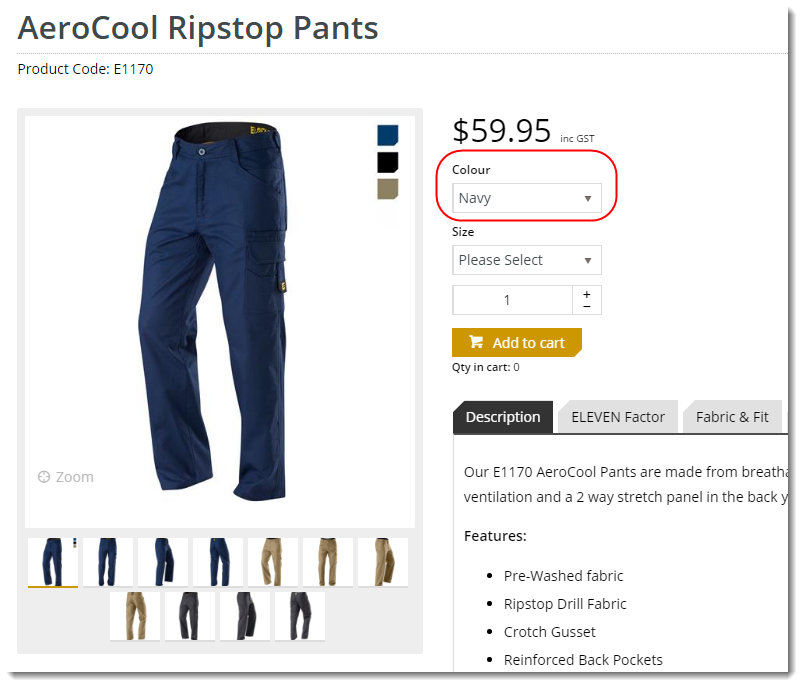
To see an example of this, visit https://www.elevenworkwear.com.au/men-s/pants/pant-cargo-cool-ripstop and select a colour option from the dropdown list.
You'll notice the image in the gallery updates according to the colour you choose.
|
|

For this functionality, all you need is a master product with multiple images loaded, and tags on the images to match product options. This guide details the steps required.
This article assumes you are already using Product Variants on your site. If you're not, or you need information on how to set this up, see our guide - Product Variants.
Upload and Tag product images
You may already have images uploaded for your products. If this is the case, skip steps 3-5 below and begin adding tags.
- In the CMS, navigate to Products & Categories → Product Maintenance.
- Search for a master product and click 'Edit'.
- Scroll to the Media section where the images are displayed.
- and click 'Upload Image' to add a new image.
- Browse to the image file and select it. Once it's 100% loaded, click 'Add'.
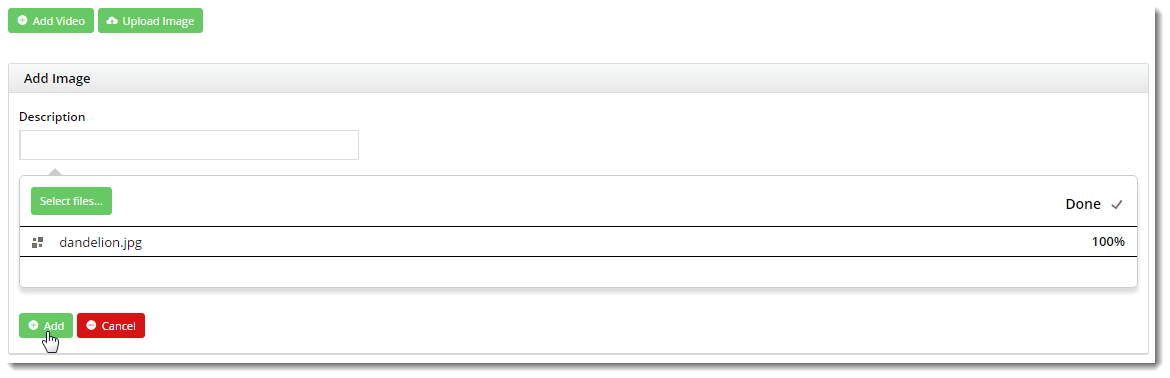
- The image should now appear in the list.
- Add a Tag to the image. The tag should correspond to a variant value of one of your child products (e.g. "Blue").

- Repeat Steps 3-6 as necessary for additional images.
- Click 'Save' or 'Save and Exit'.