Overview
Almost all customer details are maintained in PRONTO and integrated to the website. However, there are settings on the website which override some role and system based settings.
These settings are maintained via the Customer Maintenance screen as an Administrator function in the CMS or when logged into your website.
Step-by-step guides
To update a Customer's Details:
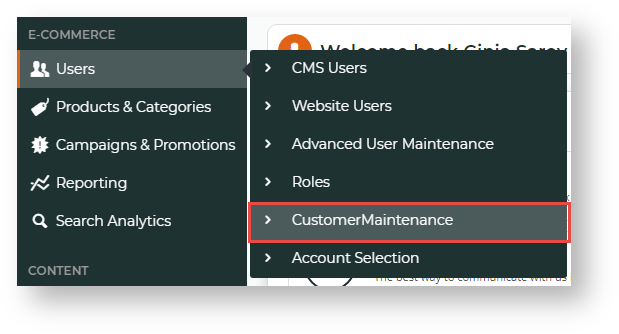
- In the CMS, navigate to Users → Customer Maintenance' (or while logged into the website: Accounts → Customer Maintenance or /CustomerMaintenance.aspx).
- Search for the required customer.
- Select the Customer record via radio button.
- Click the 'Customer Details' tab.
- Click 'Modify'.
- Update the values as required.
- Click 'OK' to save.

Any changes made to Delivery Addresses which are integrated from PRONTO will be overridden on the next integration.
Custom Catalogue Access
Access to Custom Catalogues can be defined at a user or customer level. When granting access to a custom catalogue at the customer level, all users on that account will have access to the catalogue. For information on maintaining custom catalogues, see Custom Catalogues (legacy).
To Add a Custom Catalogue:
- Login as an Administrator.
- Navigate to 'Accounts' --> 'Customer Maintenance' (/CustomerMaintenance.aspx).
- Search for the required customer.
- Select the record via radio button.
- Click the 'Catalogues' tab to view any catalogues currently attached to the customer.
- Click 'New'
- Select an available catalogue from the drop-down list.
- Tick the box marked 'Default' to set this catalogue as the default when the user logs in.
- Click 'OK' to save.
If Approval, Order or Requisition limits need to be defined on a catalogue, they must be set at the user level. For more information, see Updating a user's order limits.
Customer Cost Centres
Cost centres are used within the context of company budget practices. When cost centres are used in CSS, the cost centre is selected on each line item of an order before checkout.
Cost centres are maintained at the customer level and are shown on all orders for customers who have cost centres enabled.
To Set the Cost Centre as Mandatory:
Login as an Administrator.
- Navigate to 'Accounts' --> 'Customer Maintenance' (/CustomerMaintenance.aspx)
- Search for the required customer.
- Select the record via radio button.
- Click the 'Customer Details' tab.
- Click 'Modify'.
- Set the value for 'Require Cost Centre on Order Lines':
- Ticked - Users must select a cost centre code on each line item of the order.
- Unticked - Users are not required to select cost centres on order items.
- Click 'OK' to save.

If cost centres are set as mandatory on order lines, cost centre codes must be set up for the customer, otherwise the user will not be able to checkout.
To Add a New Cost Centre:
Login as an Administrator.
- Navigate to 'Accounts' --> 'Customer Maintenance' (/CustomerMaintenance.aspx)
- Search for the required customer.
- Select the record via radio button.
- Click the 'Cost Centres' tab.
- Click 'New'.
- Enter a value in the 'Cost Centre Code' field.
- Enter a value in the 'Name' field - this will be displayed in the drop-down selection on each line of the order for the user to choose from.
- Click 'OK' to save.

Customer Delivery Addresses
A Customer may have several delivery addresses for a user to chose from when placing orders. These delivery addresses can be set up in PRONTO and integrated automatically. If the delivery addresses are not maintained in PRONTO, they can be maintained on the 'Delivery Addresses' tab in Customer Maintenance.
To Add a New Delivery Address:
Login as an Administrator.
- Navigate to 'Accounts' --> 'Customer Maintenance' (/CustomerMaintenance.aspx)
- Search for the required customer.
- Select the record via radio button.
- Click the 'Delivery Addresses' tab.
- Click 'New'.
- Enter the delivery address details as required.
- Click 'OK' to save.

Any changes made to Delivery Addresses which are integrated from PRONTO will be overridden on the next integration.
Warning Notes
Warning notes can be added in Customer Maintenance and displayed when the record is selected for editing. The warning note can be used to display any business rules that may apply to the customer such as, 'Do not activate or modify - Contact Igor on 1234567 for more details.' Below is an example:
To Enable Warning Notes:
- Login as an Administrator.
- Navigate to 'Settings' --> 'Settings' (/zSettings.aspx).
- On the 'General' tab, tick the box for 'Enable Customer Warning Note'.
- Click the 'Update' button to save.
To Add a Warning Note:
Login as an Administrator.
- Navigate to 'Accounts' --> 'Customer Maintenance' (/CustomerMaintenance.aspx)
- Search for the required customer.
- Select the record via radio button.
- Click the 'Customer Details' tab.
- Click 'Modify'.
- Update the text in the 'Warning Note' field.
- Click 'OK' to save.
Warning Notes are available from version 3.51 onwards.
User Maintenance
In Customer Maintenance, the 'All Users' tab displays all users attached to that customer account. The user's login ID, first name and surname are displayed, along with the approval limit, order limit and requisition limit. An 'Edit' button is displayed against each user. Clicking the edit button will load the 'Advanced User Maintenance' page. 
Related help