Integrated Variant Settings
Because every business is a little different in the way they build stock codes, we'll configure the Variant settings for you on implementation of your BPD site.
If you'd like to see what your settings look like (or to update them if there's an error), follow the steps below.
- in the CMS, go to Settings → Settings → Feature Management.
- Configure the Product Variants feature.
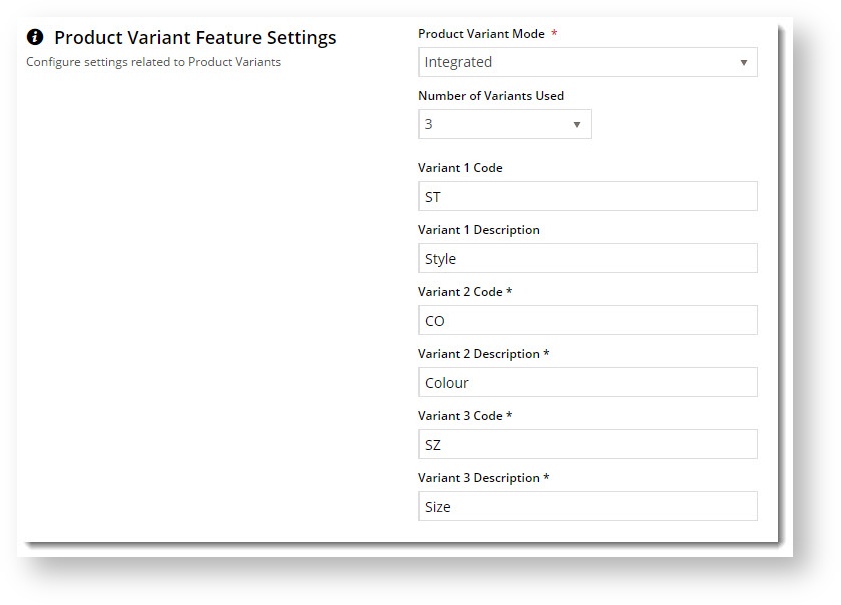
- Review settings as required:
- Product Variant Mode = Integrated
- Number of Variants Used - the number of variants in use across your product range. Products with Style, Colour, and Size options would require 3 variants.
- Variant X Code - the code from your ERP table for that part of the stockcode ('SZ' for example)
- Variant X Description - the description from your ERP table for that part of the stockcode ('Size' for example)
- If you've made any changes here, don't forget to Save & Exit.
Variant Tags
When you assign tags to your product images, you'll need matching tags against your product variant options in order for the image to switch on change of selection.
To add tags to your integrated variants:
- In the CMS, go to Products & Categories → Variant Tags.
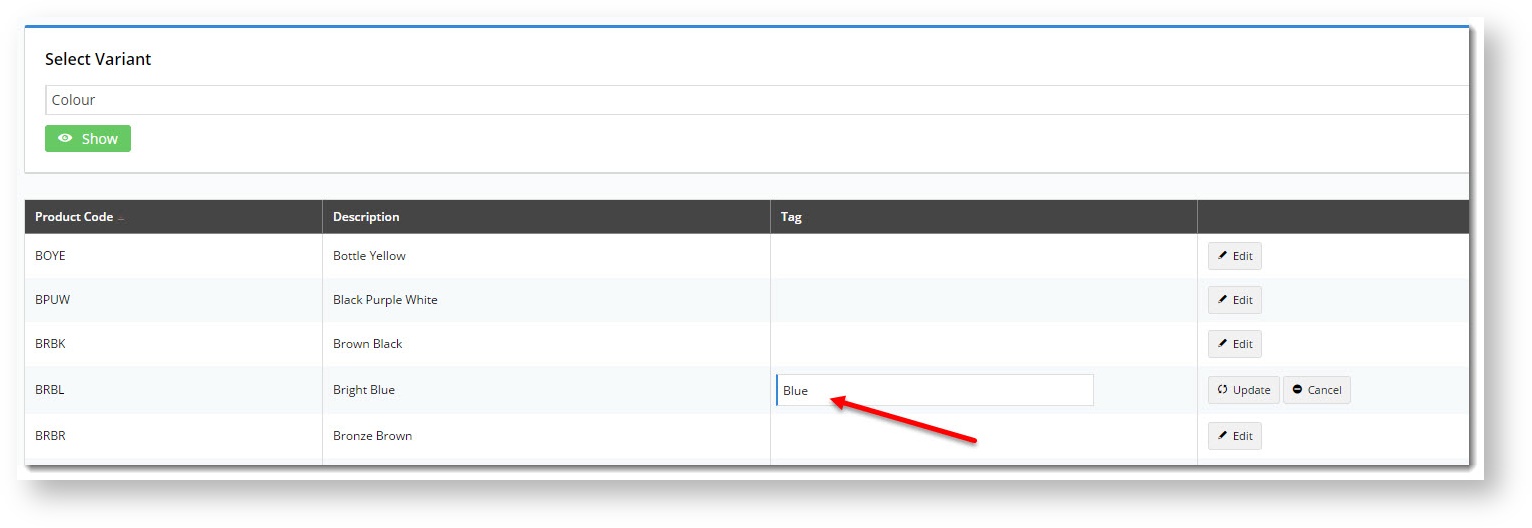
- Select a variant from the dropdown to see all data for that type (Colour or Size, for example).
- Use the search to find your variant, then click Edit.
- Enter a tag against the option, ensuring it's the same tag you've entered (or will enter) against the corresponding image in Product Maintenance.
- Click Update to save changes.
Example of use
You can see in the screenshot above, we added the tag 'Blue' to the 'Bright Blue' variant.
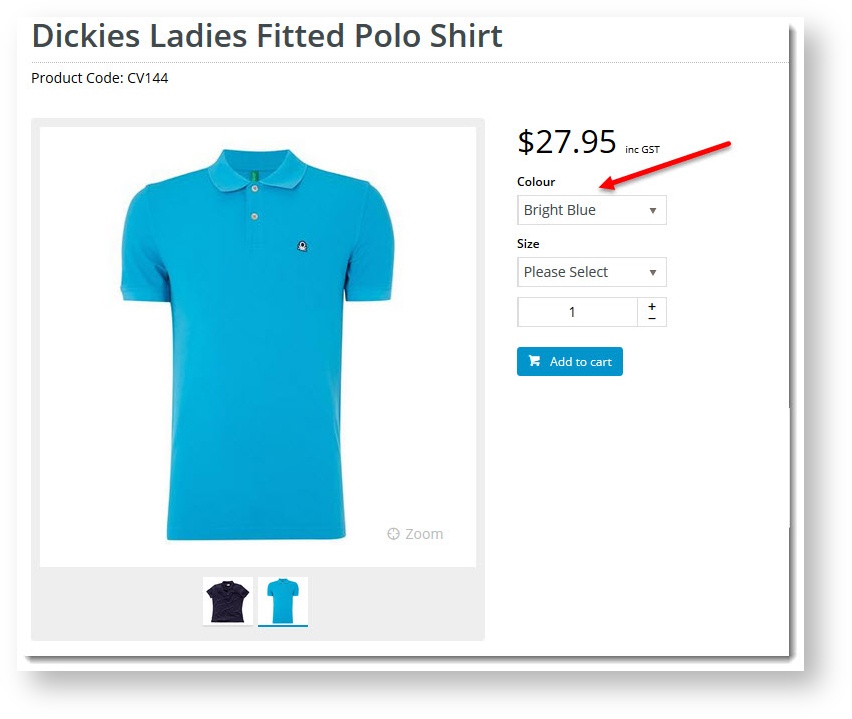
Now, any products with "Bright Blue" as an option just need an image tagged 'Blue'. When the user selects Bright Blue, the system matches the tags and the image switches accordingly.
Related help


