Overview
Have you got products on your site that need to be sold in packs? For example, product XYZ has a Pack Quantity of 4 in your ERP, so you'd like your customers to order that product in multiples of 4 only (4, 8, 12, and so on).
Luckily, Customer Self Service has a feature where you can require users to order in ERP pack quantities. This can be enforced when the product is added to cart, when a cart quantity is updated, and again at checkout.

If you're not yet on our BPD framework, scroll down to find instructions for our Classic sites.
Updating Widget Options (BPD)
On your BPD site, there are several places where customers might add items to the cart:
- in a search results list
- on a product detail page
- in an order template
- on the Favourites page
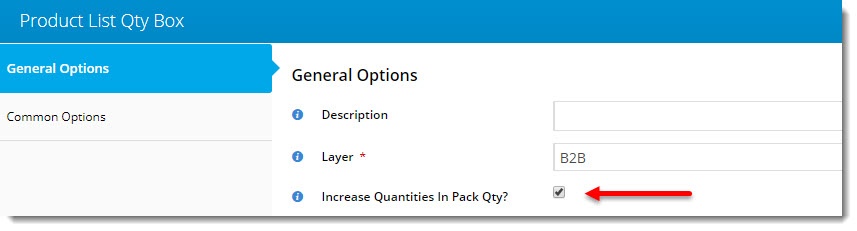
Below is a list of widgets which cover the above scenarios. Each widget has an option to "Increase Quantities In Pack Qty?", which determines whether the quantity adjuster will obey pack quantity.
Your site may use only a few of these widgets, or many. We suggest you test them on your Stage site to see the effect the above option has.
| Widget name | Scenario | Where you'll find it |
|---|---|---|
| Order Lines Widget | Products in the cart | Cart Template |
| Product Item Widget | Product lists (non-zoned layout)
| Product List Item Template |
| Product List Qty Box Widget | Product lists (zoned layout)
| Product List Item Zoned Template |
| Product Purchase Details Widget | Product detail page | Product Detail Template |
| Order Templates Widget | Products in an order template | Order Templates Page Template |
| Product Variant List Widget | Product detail page - products with style/colour/size options | Product Detail Template |
| Product Variant Grid Widget | Product lists (zoned layout) and/or Product detail page - products with style/colour/size options | Product Detail Template Product List Item Zoned Template |
| Product Item Widget | Product lists (non-zoned layout) - products with style/colour/size options
| Product List Item Template |
| Product List Variant Options Widget | Product lists (zoned layout) - products with style/colour/size options
| Product List Item Zoned Template |
| Product Compare Widget | Product compare pop-up window, where the customer can evaluate multiple products against one another | Theme Layout Template |
| Recently Viewed Products Widget | Products the customer has viewed recently, often displayed at the bottom / side of a Product detail page | Product Detail Template |
| Orders Approval Widget | For B2B customers who approve orders for others in their organisation | Process Orders Approval Page Template |
Tip!
If you'd like to enforce pack quantity ordering for one role but not another, considering adding the widget to the template twice, then using Layers to target the required role.
In the example below, I've added the Product List Qty Box Widget (x 2) to my Product List Item Zoned template. One widget is for B2B, and the other for B2C.
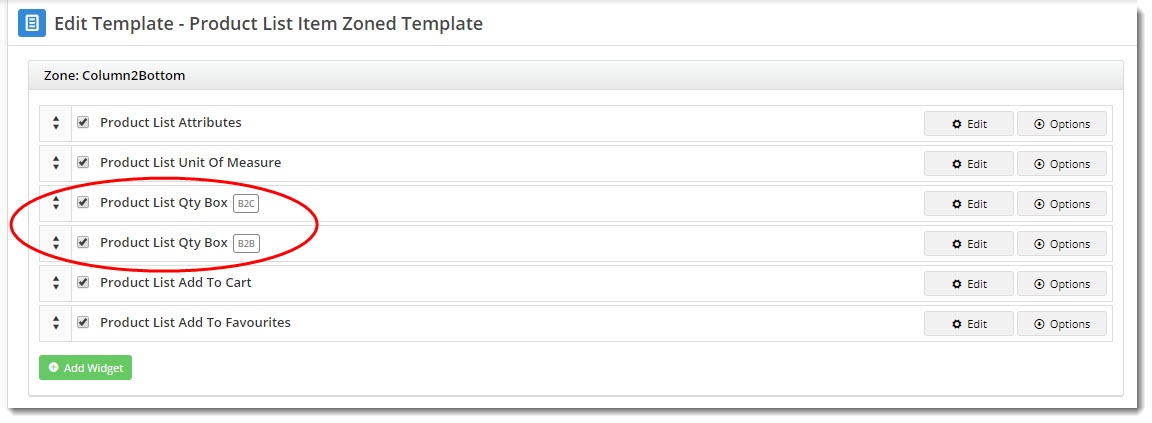
I've ticked 'Increase Quantities In Pack Qty' only on the B2B widget. So they will need to order in pack quantities, but B2C users will not.
Enabling the Functionality (Classic sites)
If you're not yet on our BPD framework, you won't have any widgets to update. In that case, you'll need to turn the functionality on at the global level. You can then override it at the role level if need be.
To enforce pack quantity at the global (site-wide) level:
- In the CMS, navigate to Settings → Settings.
- Select the Orders tab.
- On the Current Order Display tab, tick 'Force Orders Lines in Pack Quantities'.
- Click 'Update' to save.

You may wish to override this setting for particular roles. For example, you might allow B2C users to order in any quantity, but require pack quantities on B2B orders.
Once the global setting is on, you can override it at the role level as follows:
- In the CMS, navigate to Users → Role Management.
- Select the role you wish to edit. The page will instantly reload to display details for that role.
- Select the Functions tab.
- Click 'Modify'.
- Find the setting 'Force Pack Quantity on Order Entry' - set to Yes/No as required.
- Click 'OK' to save.
- Repeat as needed for other roles on your site

Related articles