Overview
An Export to Excel button can be added in the shopping cart to allow users to have their cart contents emailed to them in an Excel file. The file will include a product image for each cart item, if available. This feature is useful for customers who do not want to check out immediately but need a record of their cart's contents.
The out-of-the-box solution provides a default Excel template. All you have to do to enable the feature is add the Excel Export Button widget to the Cart template. You can also choose to use a custom-designed Excel template. This alternative requires consultation with Commerce Vision.
How it works
Your Website User has added products to their Cart. While in the Cart page, they do not want to checkout and place their order immediately. They can select the Export to Excel button instead to have a record of the cart contents emailed to them. They simply select the 'Export to Excel' button. (TIP - You can rename this button if you like.)

In the popup dialog, they enter their email address and confirm they want the email sent.
Captcha
You have the option of adding a reCAPTCHA v2 check in the dialog to prevent spam and abuse. If present, the User will be be subject to reCAPTCHA's checking process.
Depending on risk assessment results, they will be asked to:
- tick the "I am not a robot" checkbox,
- tick the "I am not a robot" checkbox and complete a challenge, or
- do nothing, with the request validated in the background.

An email with the attached Excel file of cart contents is sent. The default image of each product is included, if available. NOTE - If a product image is not available (e.g., no image or incorrect path), an 'image unavailable' message is shown against the product.

Images can be resized in Excel (or equivalents such as Google Sheets).
Step-by-step
NOTE - These steps are for the out-of-the-box version only. For the custom solution, please contact Commerce Vision.
To enable this feature, the Excel Export Button Widget has to be added to the Cart template. In the widget, you can customise the text displayed on the button, popup dialog and email message. You can also add and configure the reCaptcha service.
- Navigate to Contents → Pages & Templates.
- Use the Search tool to find the Cart template.
- Click Edit.
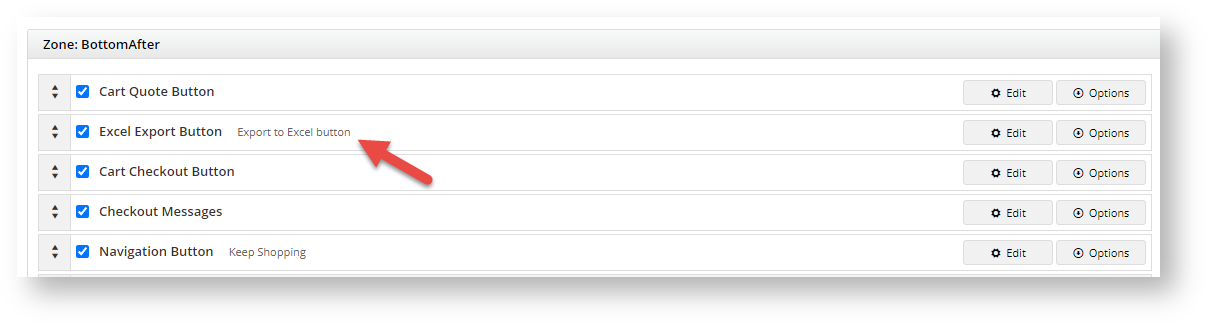
- In the zone you want the Export to Excel button to display, click Add Widget. (In the example, it has been added in Zone: BottomAfter, where it will display in the bottom right corner of the Cart page.)
- In Add New Widget, find the Excel Export Button Widget, and click the Add Widget button.
- The Excel Export Button Widget will automatically open. Configure the widget as you require. Refer to Excel Export Button Widget help for assistance on customising each field.
One you have finished, the Export to Excel button will be displayed in the Cart page.
You can easily change the button's location in the Cart page by dragging and dropping the button to the required position in a zone.


Additional Information
Minimum Version Requirements | 4.31 |
|---|---|
| Prerequisites |
|
| Self Configurable |
|
| Business Function |
|
| BPD Only? |
|
| B2B/B2C/Both |
|
| Ballpark Hours From CV (if opting for CV to complete self config component) |
|
| Ballpark Hours From CV (in addition to any self config required) |
|
| Third Party Costs |
|
| CMS Category |
|
Related help
Related widgets