The site footer is a popular location for resources such as Customer Service, FAQ, and Contact Us links. It can be helpful to users if similar links are grouped together under one heading. On BPD sites, using a Section Menu in the footer can achieve this.
Follow the guide below to create a new footer menu in the CMS and group existing content pages beneath it.
- Create the Menu
- Add the Widget
- Add Pages

Step-by-step guide
Create the Menu
- Login as an Administrator.
- Navigate to Menu Editor (/zMenus.aspx).
- Select the parent menu the footer belongs to (e.g. CSS) and click 'Parent Items'.
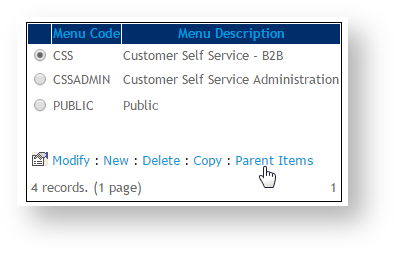
- Click 'New' to create a new section menu.
- Assign a Menu Item Code such as 'FooterMenu' (no spaces permitted).
- Assign a Description.
- Tick the 'Is a Section' option.

- If required, tick the 'No Breadcrumb If Is Section With No Page' option to make pages on this menu sit directly under the Home Page in the site structure.

- All other fields may be left at default (see Add a New Menu Item if you require further information).
- Click 'OK' to save.
2. Add the Widget
- Navigate to Theme Layout.
- Locate the appropriate zone according to your layout, and click 'Add Widget'.
- Select and add the 'Section Menu' widget.

- Click 'Edit' to configure widget options.
- Populate the 'Section Menu Item Code' with the menu item added at Step 1e (e.g. 'FooterMenu').
- Assign a List Heading for the menu (e.g. 'Our Store' in the screenshot above).
- Configure other options as required, such as icons and links.

- Click 'Save'.
3. Add Pages
In this example we'll add a Custom content page.
- Navigate to Custom Pages.
- Click 'Edit' on the required content page.

- In the Access and Security section, click 'Add Menu'.
- Select the menu from the list of options - this should be the Description entered at Step 1f, with the Parent Menu in parentheses (e.g. Footer Menu 1 (CSS)).
- Tick the 'Authentication Required' if the menu is not public and should be accessible after login only.

- Click 'Save & Exit'.
- Repeat for any other content pages required on this menu.
General widget documentation can be found here: Section Menu Widget
Related articles