Add Products to Category
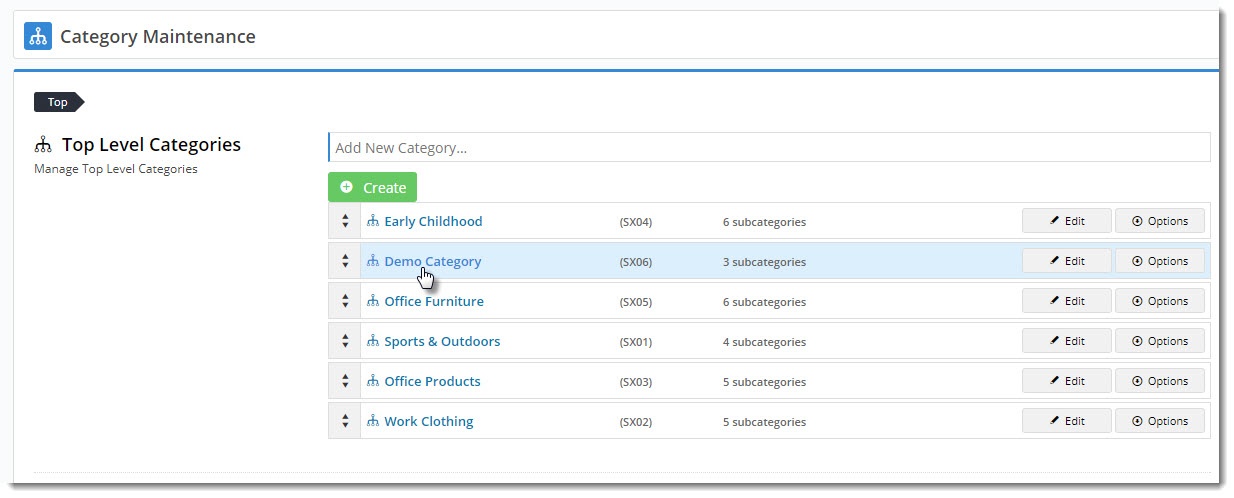
In the CMS, go to Products & Categories→ Category Maintenance.
- Click the top level category name to drill down to the category level you wish to add products to.
- Hover on Options and select Products from the menu.
- The category's products will be displayed, with an indicator to show whether this category is the product's primary location (for SEO & breadcrumb purposes).
- To add a product, start tying the code or description, then select it from the suggestions. Hit Enter or click 'Add Product' to add it.
(TIP - If you prefer to import products in bulk, skip ahead to the next section.)- (optional) Repeat Step 5 to add more products.
- Click Save or Save and Exit.
Here's an example:
Upload Products in Bulk
If you have a huge list of products to upload, you can use the import function.
Here's how:
5. Follow the steps above, but at step 5, click Import Products.
6. Click 'Download Example Template' to generate a sample .csv file.
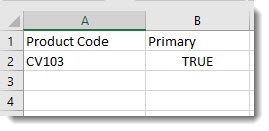
7. Paste your own product data into the sheet.
- The product code is required.
- (Optional) In the Primary column, specify whether this category is the product's primary category (true/false or yes/no). If blank, 'false' defaults unless the product has no other category links. Use of primary category: the breadcrumb on the product detail page, related product SEO data will link to this category.
8. Save the .csv file somewhere.
9. Select your Import Type:
Append (default) - adds the products in your .csv to any products already in the category
Overwrite - deletes any products in the category and replaces them with the ones in your .csv
10. Click Select files to browse to your saved .csv. Once selected, the import will begin.
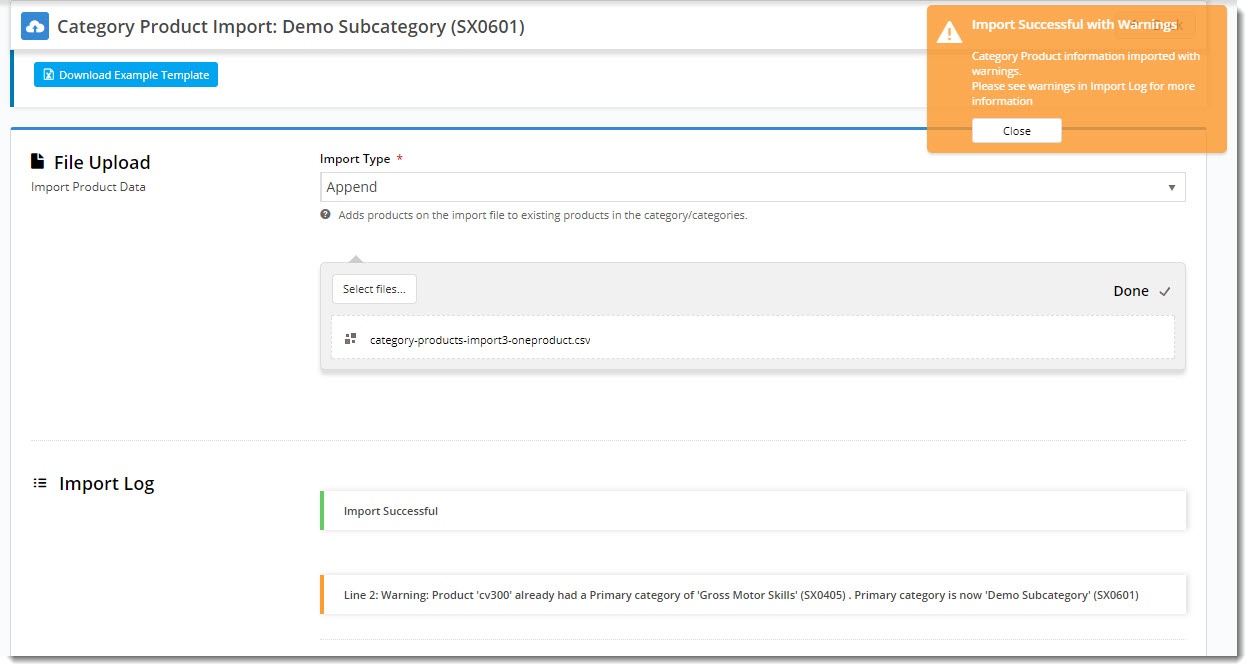
11. Check the import log to verify success or for errors. NOTE - Duplicate and invalid products will be skipped.11. Click Back to return to the category product list.
12. Click Save or Save and Exit.
Here's an example:
Once you've added products to a category, you'll need to clear the Product Cache for the products to show on your site. See: Cache Management.
Edit the Product's Primary Category
- Hover over the Options button for a product. Or select multiple products.
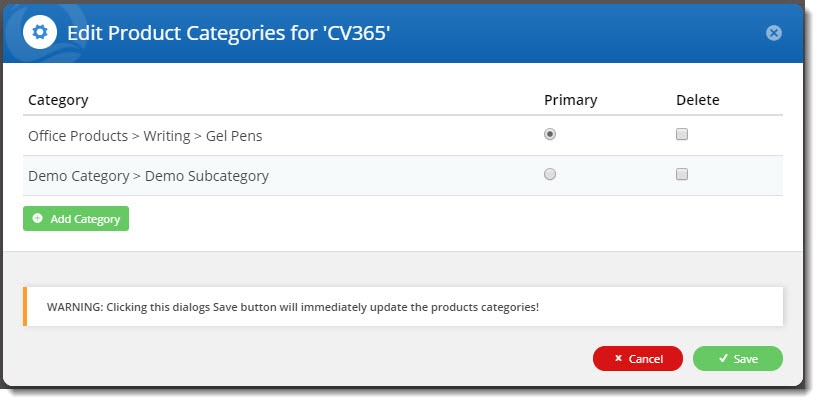
- Click Edit Product Categories.
- The popup contains all the categories this product is found in.
- Change the product's primary category assignment (radio buttons), or add/remove categories.
- Click Save. NOTE - Changes will be saved regardless of whether you click Save on the Category Product page behind it.
Go to Product Maintenance
You can go directly to a product's Maintain Product page to edit product details.
While viewing a category's products:
- Hover over the Options button for a product.
- Select Product Maintenance. This opens the Maintain Product page for this product so that other information can be edited.
Delete Products from a Category
- Hover over the Options button for a product. Or select multiple products first.
- Click Remove.
Sort Product Order in Category
The order your products display in a category can also be edited. Just drag and drop the products into any sequence (or have them sequenced as required in your .csv file), and click Save.
NOTE: If your site uses Lucene search, check the setting for Product Browse. When product browse (as well as search) is enabled, the product sequence you set in the CMS via drag & drop will be overridden.
To check your site's setting in the CMS:
- Go to Settings → Advanced Settings → Lucene Search Settings.
- Select the Index Settings tab.
- Check the status of the 'Is Disabled For Product Browse' tickbox and edit if required.
- Click the Update button to save changes.
Additional Information
--
| Minimum Version Requirements |
|
|---|---|
| Prerequisites |
|
| Self Configurable |
|
| Business Function |
|
| BPD Only? |
|
| B2B/B2C/Both |
|
| Third Party Costs |
|
Related Resources
