Overview
You probably already know that BPD websites come equipped with a clean, well-organised news article layout right out of the box.But what if you've got additional content to display in your articles? Or what if you'd prefer a customised page layout, completely unique to your site?
That's where the zoned layout option comes in! By using a zoned article layout, you can present your article in the layout of your choice, with content arranged as you please.
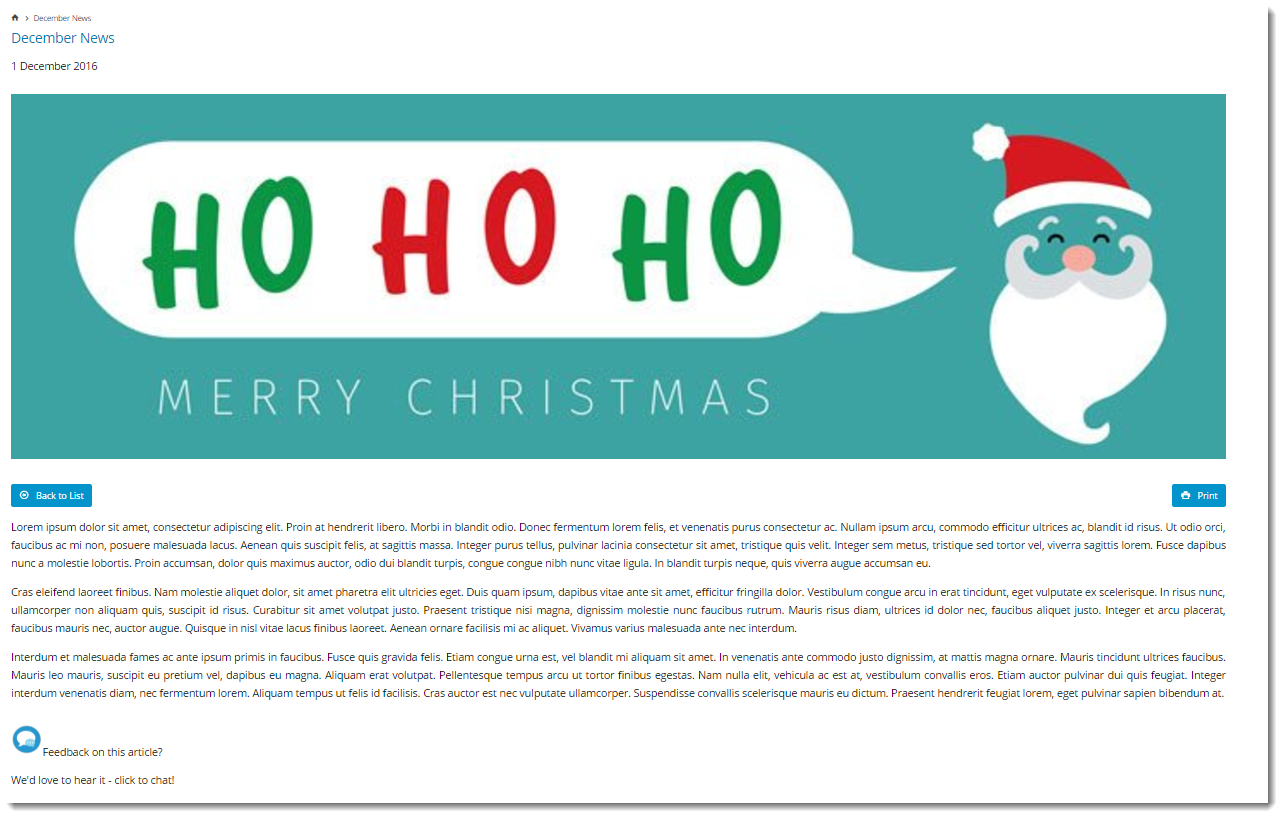
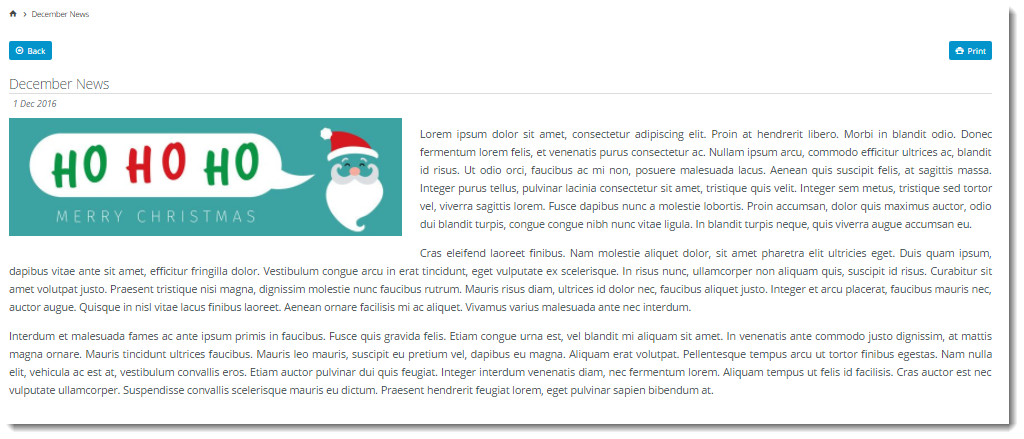
| Zoned Layout | Non-Zoned Layout |
|---|---|
|
|
This guide will outline how to enable the zoned layout for your article detail pages.
Step-by-step guide
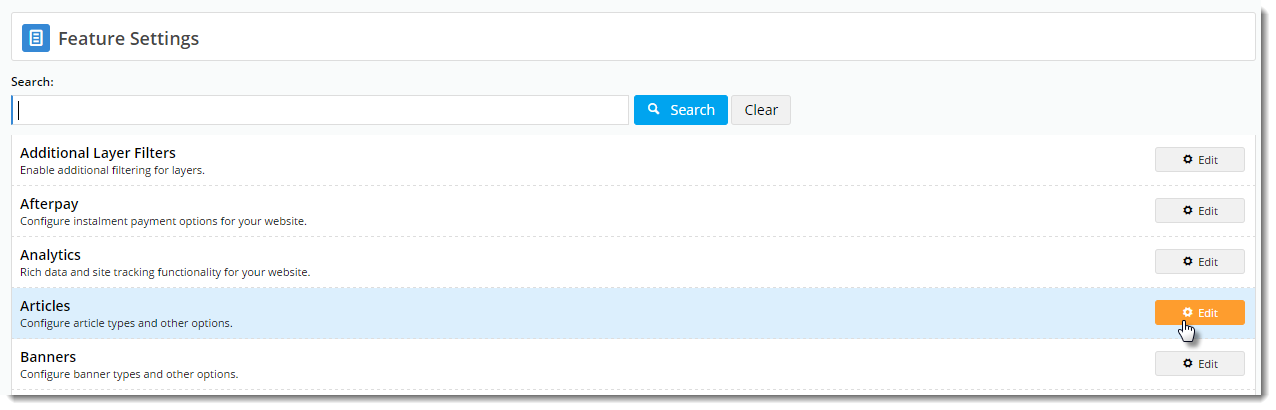
1. Update the Feature setting to use Zoned Article Layout.
- Navigate to Settings → Feature Settings.
- Edit the Articles feature.
- Tick the option to 'Use Zoned Article Template'.
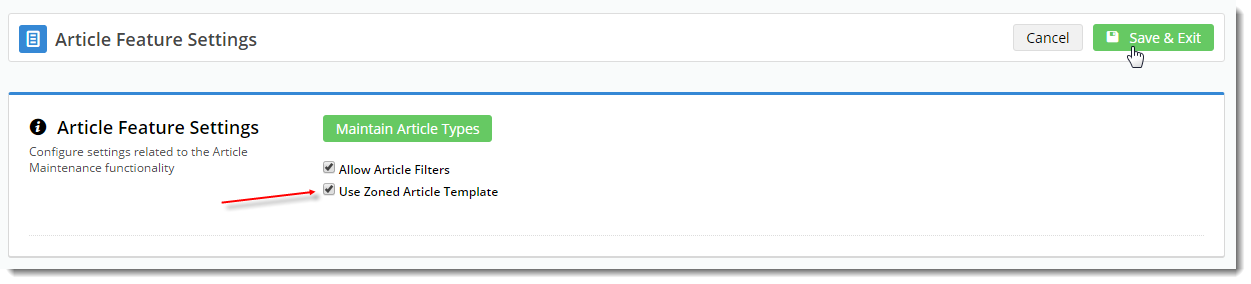
- Save & Exit.
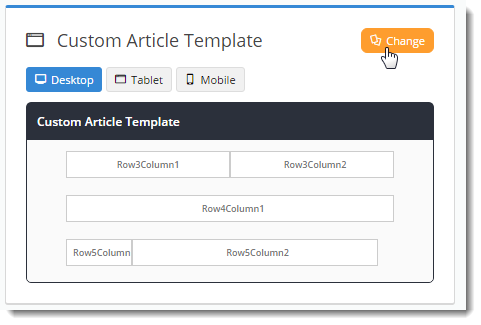
2. Customise the Article Page Zoned template:
- Navigate to Content → Standard Pages.
- Select the 'Article Page Zoned' template.
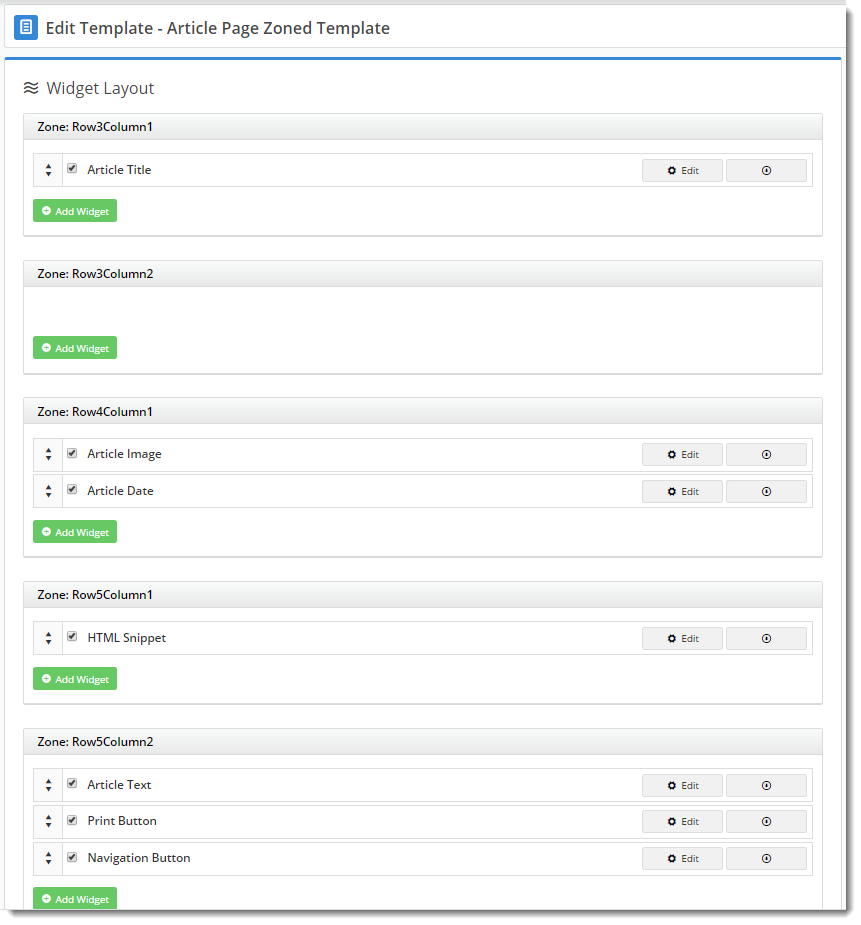
- The default widgets will be present on the template (Article Title, Article Image, Article Date, to name a few).
- Drag and drop widgets to re-order them or move into different page zones, or add and delete widgets as needed.
For example, add an HTML Snippet widget to display a company logo or chat icon in the corner of every news article.- Edit the options for existing widgets if required.
- To change the entire layout of the article page, click 'Change' in the layout preview panel. Follow our Custom Layout Creator guide for instructions on how to create your own custom article layout!
- Load an Article page in another browser or incognito window to see your changes reflected.

Related articles