Contents
Overview
The product categories on your website are initially integrated from your ERP, but if it suits your business processes, you can bypass PRONTO category integration and opt for complete online maintenance.
Prerequisites
In order to maintain categories online:
- The 'Product Maintenance' feature must be enabled with the 'Categories' option ticked. If this wasn't done during your site's implementation phase, you can request that we update it for you at any time.
- Category integration from PRONTO must be disabled (by Commerce Vision) via the flag 'Disable Product Category Integration' - otherwise the changes you make in the CMS will be overwritten on the next send of data from the Integrator.
Once the above conditions are met, you're ready to maintain your product categories in the CMS!
Step-by-step guide
To access Category Maintenance, login to the CMS and navigate to Products & Categories → Category Maintenance.
The page will look something like this:

Here, you can either search for the category you wish to edit, or you can use paging to navigate through the list. To make changes to a category, click 'Edit'.
Editing a Category
The various sections of the Category Maintenance screen are detailed below.
Category Information
This section displays the category information integrated from PRONTO.
| Field | Description |
|---|---|
| Category Code | This field is not editable via the CMS and is shown for reference only. |
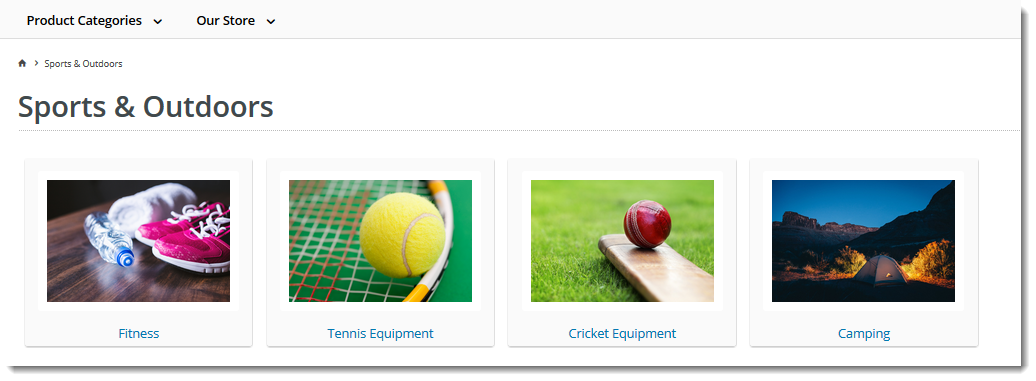
| Description | This is your category name. It will appear on the category list page, and at the top of the product list when users drill down to view the category. |
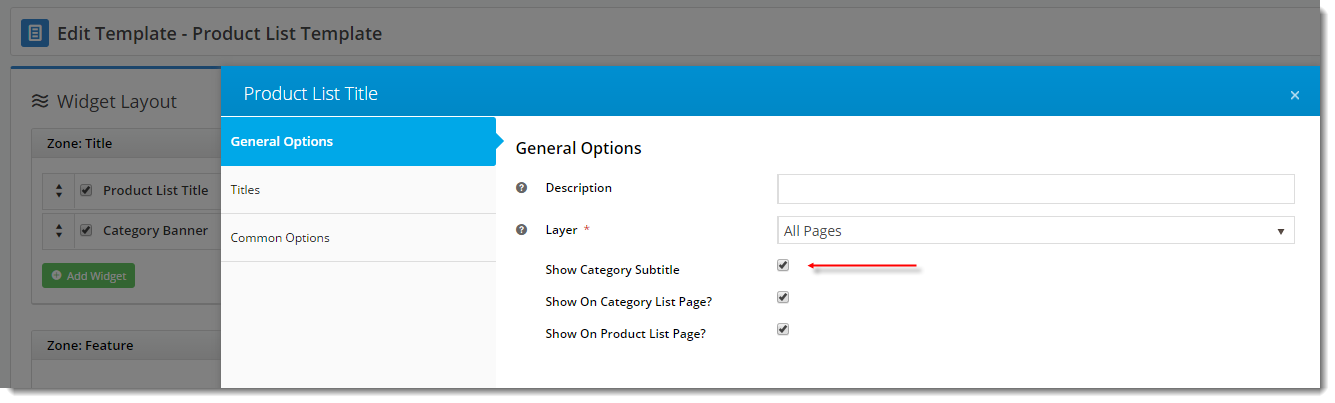
| Subtitle | The text in this field will be displayed if the 'Show Category Subtitle' option is ticked on the Product List Title Widget (found on the Product List page template). |
| Hidden | Tick this option to exclude this category from your site's menu or category list. |
| Category Image | Assign an image to your category using the 'Select or Upload Image' option.
|

SEO Settings
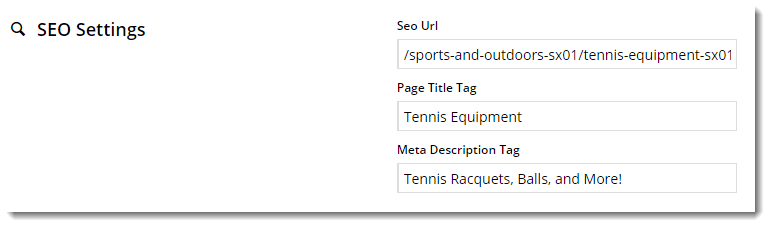
Search engine-friendly URL, Page Title, and Description tags for the category are maintained here.
These values are normally auto-generated on first integration. You may edit any of these values as required and they will not be overwritten on subsequent integration events.
| Field | Description | Example |
|---|---|---|
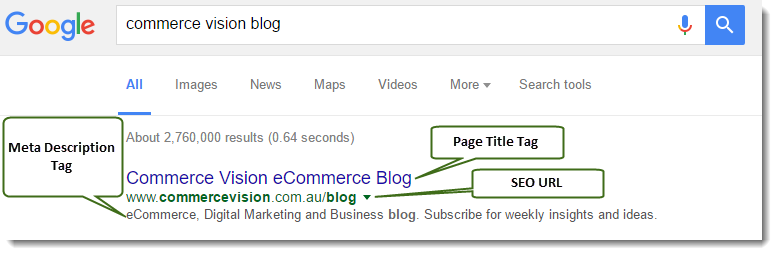
| SEO Url | The user- and search engine-friendly URL for the category page. | Here's an example of these SEO settings in the real world. The Commerce Vision Blog is obviously not a product category, but the principles are the same.
|
| Page Title Tag | The title that displays on search engine results pages, just above the URL. | |
| Meta Description Tag | The blurb that displays under the Title and URL. |
Category Banner
In this section, you can add a banner image to display on the category page. Add a title, some text, and an image.
| Category Banner Data in CMS | Resulting Output |
|---|---|
|
|

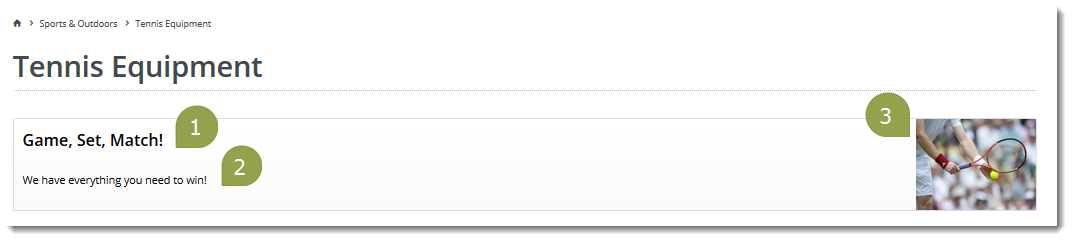
Display banners on your category pages by adding a Category Banner Widget to the Product List Template.
Custom Fields
If you have created any custom fields for the Category table (and they are marked 'active'), the maintenance area will display here.
If there are no active custom fields in your Product table, this section will not render.

Need more information? See How To Add Custom Fields To Products and Categories.
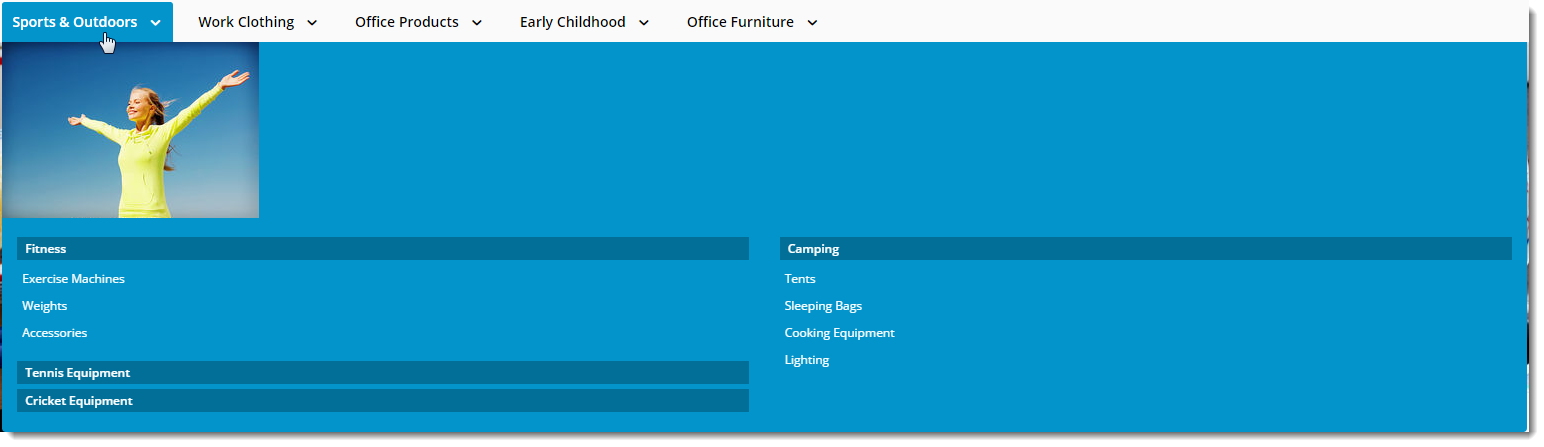
Mega Menu Zone
If your website uses a Mega Menu (rather than a Navigation Menu), you can edit the content to display around the menu edges here. For example, you may wish to add images to the top of each menu item, links or other content.
Content editing is available for all four sides (Top, Bottom, Left, Right). In the example below, we have added an image to the Top zone of the category 'Sports & Outdoors'.
| Mega Menu Zone Data in CMS | Resulting Output |
|---|---|
|
|

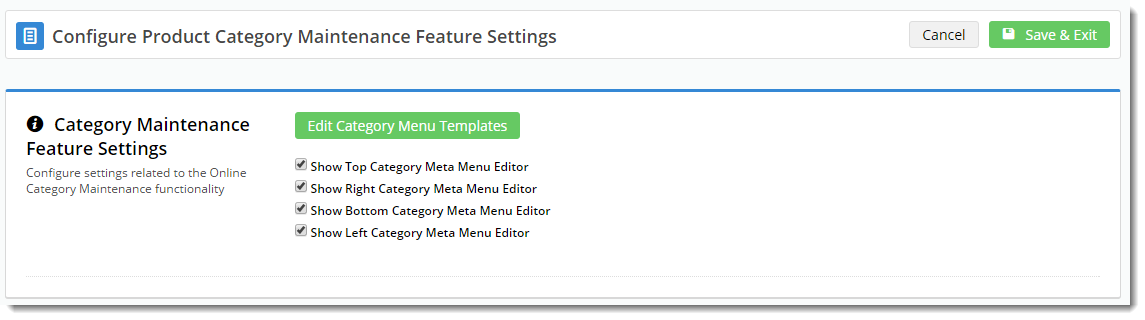
Please note - this section will only be displayed if you have enabled it in the Feature Settings.
To enable, navigate to Settings → Feature Management and Configure the Online Category Maintenance feature. Tick the zones you wish to edit content for, and 'Save & Exit'.
Related Articles