Customer Self Service Questionnaires are a flexible way to create and present forms and collect user information. Some common uses include:
- Contact Us
- Returns
- Warranties
- Feedback
This guide will cover how to create and implement a Questionnaire in BPD sites on version 3.78+.
There are 3 overall steps in the process:
- Create the Questionnaire
- Add Questions
- Place & configure the Widget
Step-by-step guide
1. Create the Questionnaire:
- Login to the CMS.
- Navigate to Advanced Content --> Questionnaire Group Maintenance (/QuestionnaireMaintenance.aspx).
- Click 'New'.
- Set the values as follows (fields not listed here may be left blank):
- Questionnaire Code - a unique identifying code
- Questionnaire Description - a brief description of the questionnaire
- Spam Validation - tick this box to enable Captcha functionality for anti-spam
- Attachment Upload - tick this box to allow the user to attach files on submit (file types will be specified in the widget)
- Click 'OK' to save.
- Add Questions:
- With the relevant Questionnaire selected, click 'Questions'.
- Click 'New'.
- Select a question from the 'Question Code' drop-down.
- Assign a numeric sequence.
- Click 'OK' to add.

- Repeat as needed until all question fields have been added to the questionnaire.
Click 'Refresh Dictionary'.
If the Question you require does not appear in the Question Code drop-down, new questions can be added by following these steps:
- Navigate to Advanced Content --> Questionnaire Field Maintenance (/QuestionMaintenance.aspx).
- Click 'New'.
- Set the values as follows:
- Question Code - a unique code to easily identify this question for selection later on
- Question Text - the question prompt which will be displayed to the user
- Sequence - determines the order in which the question appears in the maintenance screen. This will default to the next available sequence number, but can be overwritten
- Answer Format - the required format for responses to this question (e.g. Short Text, Number, Tickbox, etc)
- Length - the number of characters the field is to be restricted to (if applicable)
- Required - tick this box if this question is to be mandatory
- Help - enter tooltip text here - either a further explanation or example; anything which might assist the user in completing the questionnaire
- Hidden - tick this box if the question should NOT appear on the questionnaire (used to render hidden HTML elements on a questionnaire page)
- Click 'OK' to save.
Questions created here will now be available for use in any Questionnaire.
- Place & configure the Widget
(in this example we'll use an existing custom page):
- Navigate to Content --> Custom Pages.
- Click 'Design' on the required Custom Page. (Note - if there is no 'Design' button, your page is not widget-based and will need to be converted via page Options.)
- Click 'Add Widget'.
- Search for and add the Questionnaire widget.
- Click 'Edit' on the widget.
- Configure options as required. Refer to the widget documentation for a detailed explanation of all options.

- Click 'Save'.
- Navigate to the custom page and view your new questionnaire!


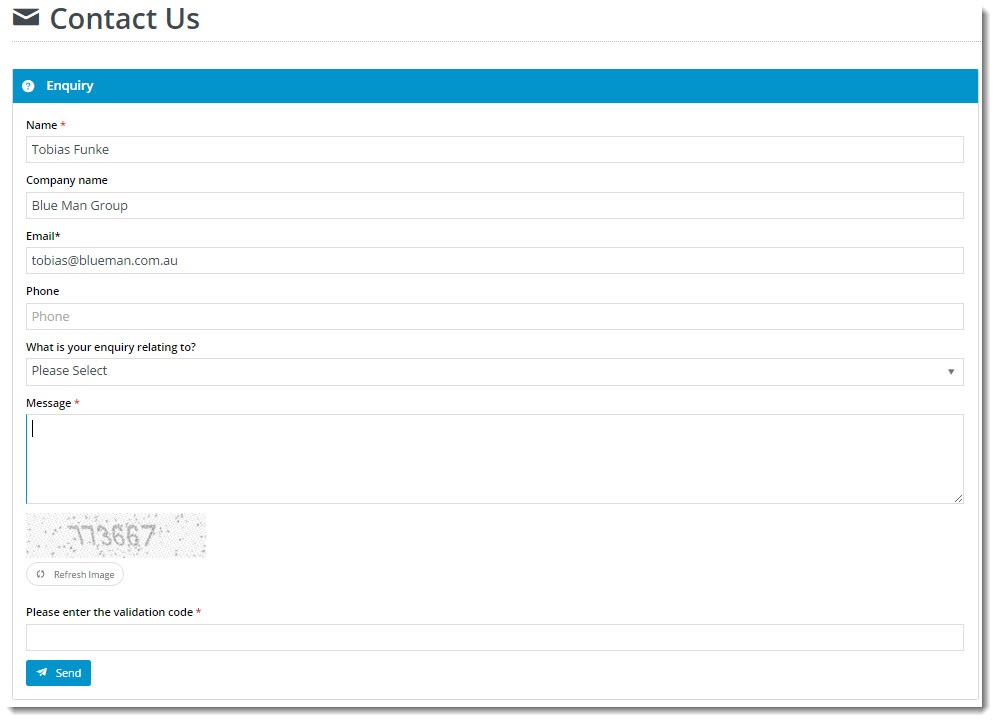
Pro Tip
Make your customers' lives easier by prefilling some of the questionnaire fields for them!
From version 3.92+, you have the ability to pre-populate fields based on customer/user data, or page parameters.
For example, Name and Company Name (for logged in users), or product code (if the form is a stock enquiry form on a product detail page). Here's a quick how-to:
- First, find your questionnaire fields - navigate to Advanced Content → Questionnaire Group Maintenance.
- Select your questionnaire and click the 'Questions' link. This will show you the field name of each questionnaire field - take note (or a screenshot!).
- Now, go to Advanced Content → Questionnaire Field Maintenance.
- Search for the field you wish to prefill and click 'Modify'.
- Enter the appropriate value in the 'Token to Prepopulate' field (see table below).
- Click 'OK' to save.
- Click the 'RefreshDictionary' link to update your questionnaire.
- Repeat for any remaining fields.
| Field to Prefill | Token |
|---|---|
| User Name | User.FirstName,User.Surname |
| Company Name | Customer.Name |
| Email Address | User.EmailAddress |
| Phone | User.PhoneNumber |
If you don't see the token you're after, contact our friendly Support team for assistance.
Related articles