Overview
Articles differ from static content in that they can change based on posted date, start, and finish date. For example, a promotional article could be published which would disappear at the end of the promotional period.
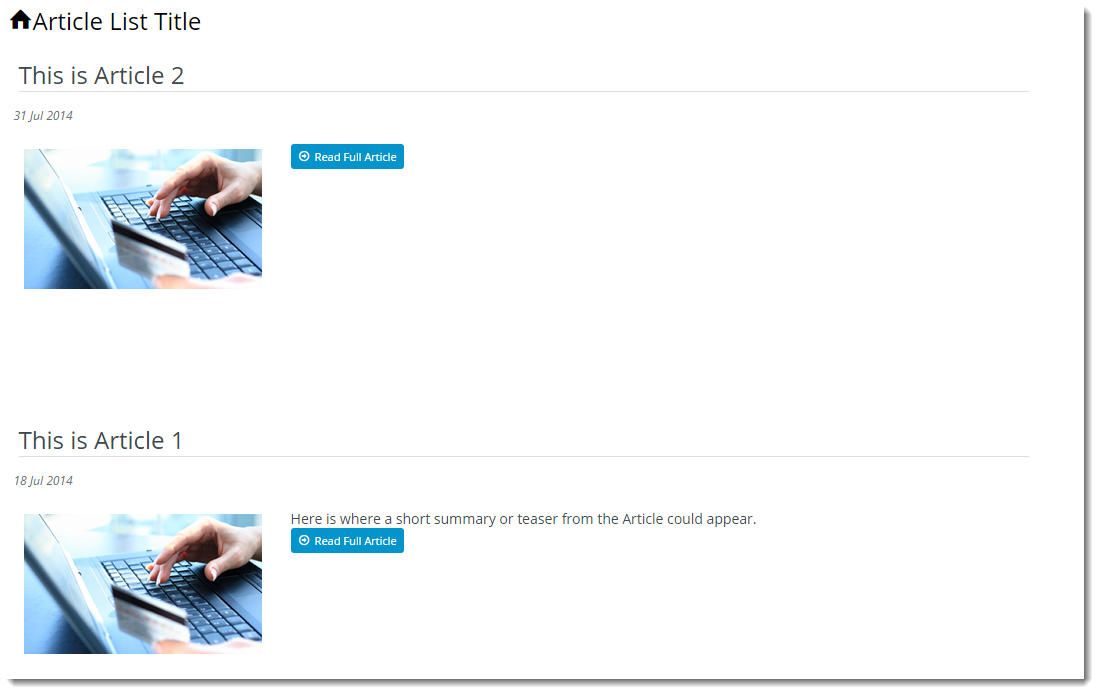
This guide outlines how to publish Articles, which can be displayed across various sections of the website, often in a 'Latest News' layout.
Step-by-step guide
To create an article:
- Upload the required image files to the server via FTP. For further information, see Loading site content via FTP using FileZilla.
- Login in as an Administrator.
- Navigate to 'Content' -> 'Article Maintenance'.
- Click the 'Article Maintenance' tab.
- Click 'New'.
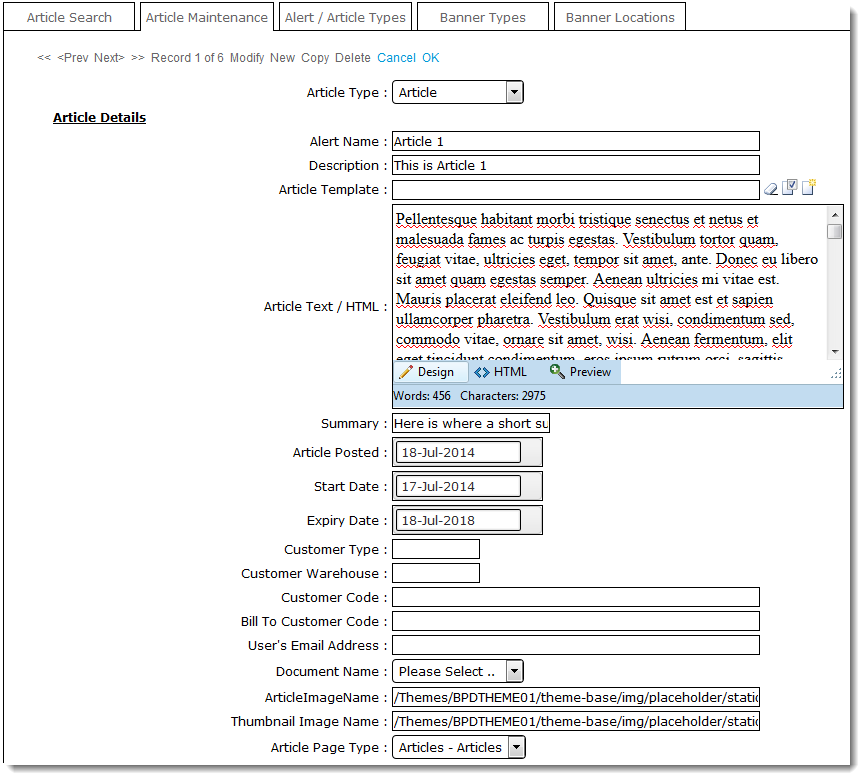
Enter values for the following fields (any fields not listed below may be left blank):
PromptValueNotesArticle Type Article This option should be available in the drop-down list. Alert Name Article identifier/name Generally for Administrator use; this field isn't displayed by default. Description A short description of your Article This is normally the Article heading. SEO URL The URL path required
This should be formatted as "/required-url". This will ensure the URL of the Article is user and SEO-friendly, rather than the system default of '/ArticleView.aspx'.
The URL Routing for Articles needs to be configured in order for this field to work correctly.
Article Template (Optional)
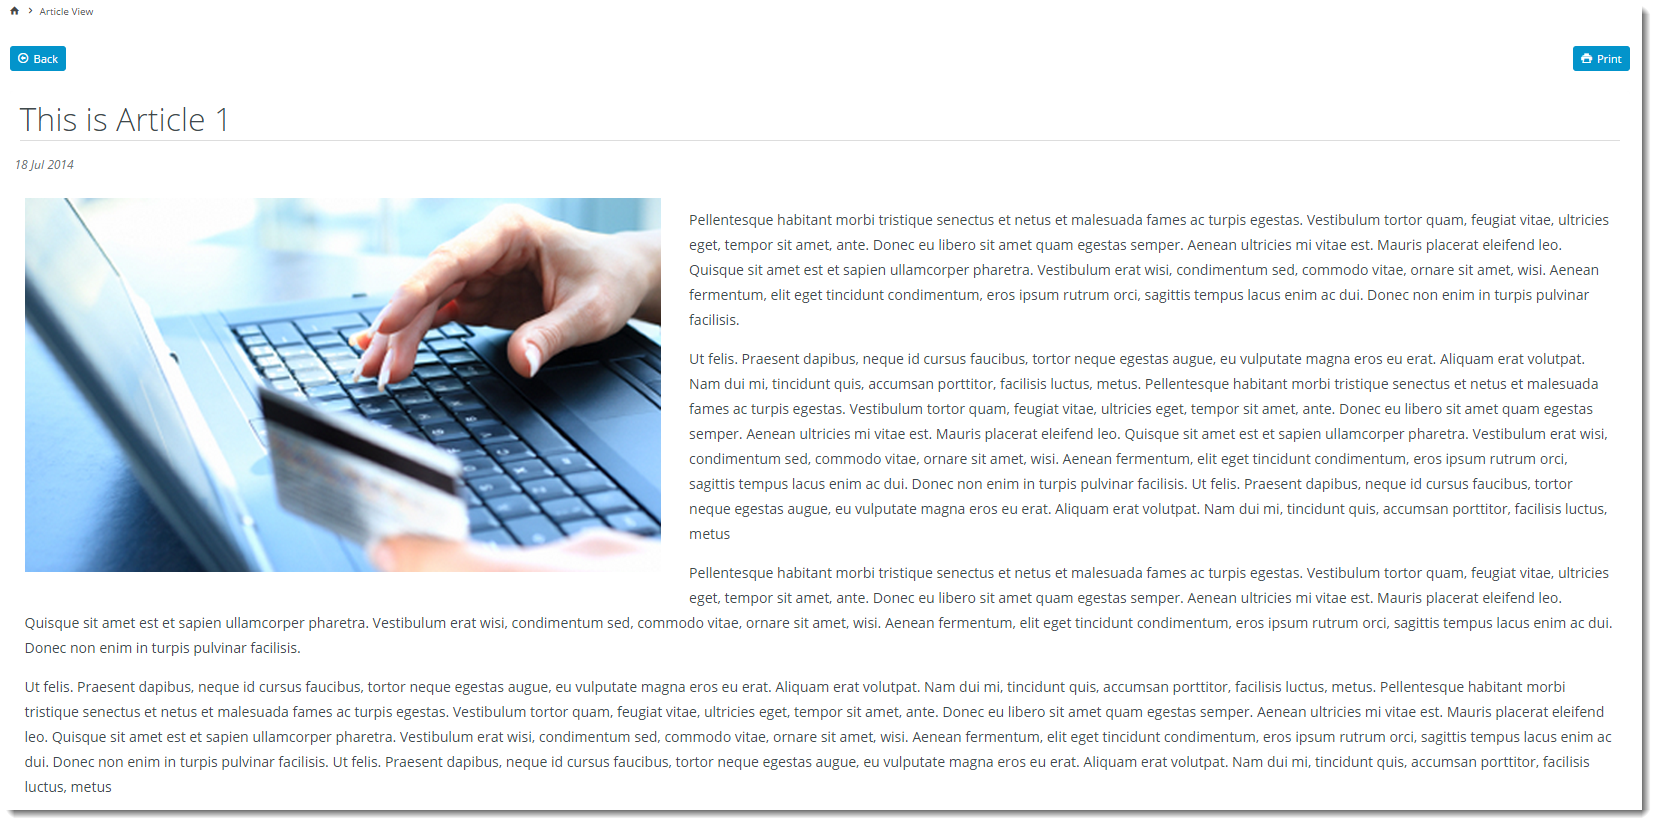
If this article has additional content that needs to be rendered, create a new article template. (This field is only used by sites not on Best Practice Design) Article Text / HTML Actual Content of the Article This is the content of the Article, displayed once the user clicks the 'Read' button on the front/news page. Summary A short summary This content displays near the 'Read' button in Article list view. (Only available from version 3.74+). Article Posted The Date of the Post This is used for sorting purposes so that the latest posted appears first. Start Date Start Date of the Article The article will automatically appear on this start date. Expiry Date End Date of the Article The article will disappear after the end of this date. Article Image Name Image name including file path. This is the large image that appears in Article view. Thumbnail Image Name Image name including file path. This is the thumbnail image that appears in Article list view. Article Page Type Articles - Articles This option should be available in the drop-down list. - Click 'OK' to save.
- Repeat Steps 4 - 6 as required to create additional Articles.
Attach the data source Articles,Article.GetArticlesNotExpiredForCurrentUser(null,-1,2,"") with the sample code below:
@foreach (Article article in Model.Articles) {
    <div class="news-item">
		<h4>@Raw(article.Description)</h4>
      <p>@Raw(article.ArticleText)</p>
	</div>
}
Additional Information
Articles can also be targeted to specific customers or users. Simply populate the relevant field with the required Customer Code, Type, or User Email Address, for instance. The article will then be restricted to that user or group. Leaving these fields blank will default to ALL users.
| Minimum Version Requirements |
|
|---|---|
| Prerequisites |
|
| Self Configurable |
|
| Business Function |
|
| BPD Only? |
|
| B2B/B2C/Both |
|
| Third Party Costs |
|
Related help