Overview
With a CSV file, new website users and user customers can be imported in bulk, saving the administrator from manually creating each record individually. Each row of the CSV file corresponds to a user record. You can also bulk import User ID changes and user deletions.
Import Users
1. Create and populate new users CSV file
Download this csv template or follow the instructions to create one.
To create the CSV file for import:
In an editor such as Notepad, open a new text file. You can also use Excel.
- Copy and paste the following text into the file:
EmailAddress, NotifyEmailAddress, Deactivated, FirstName, Surname, Password, ConfirmPassword, JobTitle, Section, PhoneNumber, FaxNumber, DefaultCostCentre, CustomerCode, GlobalCatalogueAccess, OrdersApprovedBy, SpecialInstructions, ContractItemsOnly, InitialRole, ApprovalType, ApproveNonContract, DenyApprovalProductEntry, AllowApprovalProductEntry - Save the file with an extension of .csv
2. Populate the CSV file with records
- Open this CSV file in Excel. The header text (fields) should be displayed in Row 1 (Line 1) of the first 22 columns.
The CSV file should look like this (in Excel): - Enter one user record per row. This means User 1 occupies Row 2 (Line 2), etc. NOTE - Some fields are mandatory. If a mandatory field is not populated for a user record, the user will not be uploaded.
Fields marked with * are mandatory.
- EmailAddress*
- NotifyEmail*
- Deactivated* (Yes or No)
- FirstName
- LastName
- Password
- ConfirmPassword (Yes or No)
- JobTitle
- Section
- PhoneNumber*
- FaxNumber
- DefaultCostCentre
- CustomerCode*
- GlobalCatalogueAccess (Blank, Denied, Full or ViewOnly)
- OrdersApprovedBy
- SpecialInstructions
- ContractItemsOnly (Yes or No)
- InitialRole*
- ApprovalType (Blank, SPU, MPU, SPA, MPA, MPAS, H, HC or HAL)
- ApproveNonContract (Yes or No)
- DenyProductEntry (Yes or No)
- AllowApprovalProductEntry (Yes or No)
- When all records have been entered, save the file.
3. Upload CSV file
To upload the prepared CSV file to your website:
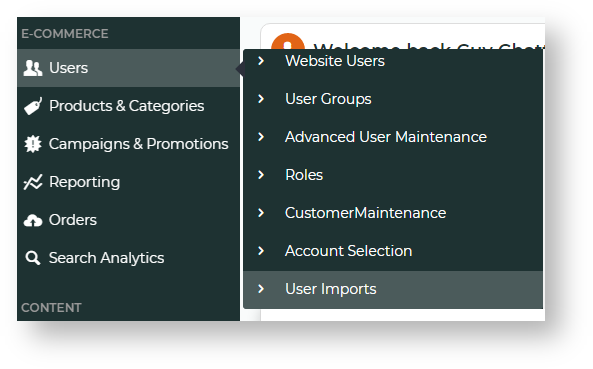
- In the CMS, navigate to Users → User Imports. Or when logged in as Administrator on your site, Accounts → User Import (/zUserImport.aspx). NOTE - If this page has not been set up for your website, please contact Commerce Vision for assistance.
- In the first section of the page called 'Enter or browse for the flat file containing your User CSV file to be imported.', click the Choose File button.
- Select the CSV file. Once selected, the file name displays next to Choose File.
- To have a registration notification emailed to every new user, tick Send Notification email to all imported users. NOTE - Users flagged as initially deactivated will not be sent an email notification.
- Scroll down and click the Import Now button.
- Check the message box below 'Import Now' to verify your import is successful. Any skipped rows and errors will be displayed.
Related help


