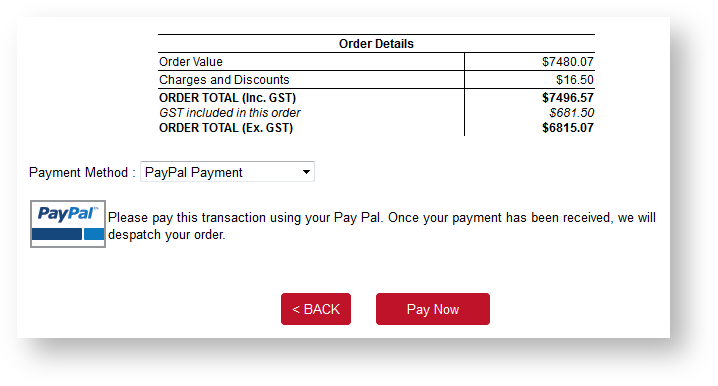
PayPal is integrated into the Customer Self Service eCommerce Platform. You can accept PayPal payments easily and securely by enabling the PayPal setting or as an option for Braintree Payments. PayPal allows your customers to link multiple cards and bank accounts to their PayPal account, and choose one of these during checkout. Account holders can manage their account online and view the status of their transactions.
PayPal offers their own fraud protection methods (see Paypal for details).
- Before enabling PayPal in your Live production site, Commerce Vision recommends you undertake testing in your Stage site using the PayPal Sandbox environment.
- Information about the PayPal Sandbox environment can be found at: https://developer.paypal.com/docs/classic/lifecycle/sb_overview/
ERP
PayPal payments will appear in your ERP package as normal cash receipts. Orders are held on the website until the payment has been verified and accepted. You can view all payments via your PayPal online account.
To enable PayPal payments, the following steps need to be completed:
Sign up for a PayPal Business account.
- Configure your site for PayPal.
- Set up the Punchout Document.
- Set the Document code as the PayPal Template.
- Update the Customer Message Resource.
- Update the Resource Value which displays the Payment Options text.
Step-by-step guides
1. Sign up for a PayPal Business account
- Visit PayPal's Merchant signup page - https://www.paypal.com/au/webapps/mpp/accept-payments-online
- The PayPal business account sign up process will require details about your organisation, including business type and business name.
Record your PayPal business identification details for the web site configuration.
2. Configure your site for PayPal
- Once you have successfully created your PayPal account, log a support call with Commerce Vision to have your Stage site configured.
- Provide the URL of your Stage site and a date by which the configuration is required.
- Commerce Vision will advise you when the system and menu have been configured.
3. Create the Punchout Document
Once the Support team has added the Punchout Document to the menu, you can create the document that is sent to PayPal when payments are processed.
- Login as an Administrator.
- Navigate to 'Settings' --> 'Punchout Document' (/zPunchOutDocuments.aspx).
- Click the 'cXML Document Setup' tab.
- Click 'New'.
- Populate the fields as follows:
- Document Code: SandBoxTest
- Description: SandBoxTestCV
- Document Type: PayPal
Header Template: use the code snippet below
Code Snippet<html> <body> <form ID="form" name="form" action="https://www.sandbox.paypal.com/cgi-bin/webscr" method="post"> <input type="hidden" name="cmd" value="_cart"> <input type="hidden" name="upload" value="1"> <input type="hidden" name="business" value="example@commercevision.com.au"> <input type="hidden" name="no_shipping" value="1"> <input type="hidden" name="no_note" value="1"> <input type="hidden" name="currency_code" value="[order:socurrcode]"> <input type="hidden" name="lc" value="AU"> <input type="hidden" name="custom" value="[receipt:ReceiptNumber]"> <input type="hidden" name="return" value="http://www.YourWebSite.com/OnlinePaymentOK.aspx?receipt=REC[receipt:ReceiptNumber]&type=PAYPAL&order=[ORDER:SOORDERNO]"> <input type="hidden" name="cancel_return" value="http://www.YourWebSite.com/OnlinePaymentFail.aspx?receipt=REC[receipt:ReceiptNumber]&type=PAYPAL&order=[ORDER:SOORDERNO]"> <input type="hidden" name="rm" value="2"> <input type="hidden" name="item_name_1" value="Order Total - Your Business Name"> <input type="hidden" name="item_number_1" value="Order"> <input type="hidden" name="amount_1" value="[ORDER:SOORDERTOTALAMOUNT]"> <input type="hidden" name="notify_url" value="http://www.YourWebSite.com/PayPalNotify.aspx"> <input type="hidden" name="address_override" value="1"> <input type="hidden" name="address1" value="[ORDER:SoDelAddr2]"> <input type="hidden" name="address2" value="[ORDER:SoDelAddr3]"> <input type="hidden" name="city" value="[ORDER:SoDelSuburb]"> <input type="hidden" name="country" value="AU"> <input type="hidden" name="email" value="[ORDER:SoUserIDCode]"> <input type="hidden" name="first_name" value="[ORDER:SoDelAddr1]"> <input type="hidden" name="zip" value="[ORDER:SoDelPostcode]"> <script language="Javascript"> document.forms["form"].submit(); </script> </form> </body> </html>- Update the following code lines with your information:
- Line 3 - Replace the value "https://www.sandbox.paypal.com/cgi-bin/webscr" with the Sandbox URL provided by PayPal.
- Line 6 - Replace the value "example@commercevision.com.au" with your business identification created by PayPal.
- Line 12 - Replace the value "http://www.YourWebSite.com/OnlinePaymentOK.aspx?receipt=REC[receipt:ReceiptNumber]&type=PAYPAL&order=[ORDER:SOORDERNO]" with the address of your website and the page customers are returned to when a payment has been successful. The complete URL address is required; do not remove the address from 'OnlinePaymentOK' onwards.
- Line13 - Replace the value "http://www.YourWebSite.com/OnlinePaymentFail.aspx?receipt=REC[receipt:ReceiptNumber]&type=PAYPAL&order=[ORDER:SOORDERNO]" with the address of your website and the page customers are returned to when a payment has been unsuccessful. The complete URL address is required; do not remove the address from 'OnlinePaymentFail' onwards.
- Line 15 - Replace the value "Order Total - Your Business Name" with the message displayed to users during payment processing.
- Line 18 - Replace the value "http://www.YourWebSite.com/PayPalNotify.aspx" with the address PayPal use to communicate with your website.
- Click 'OK' to save.
4. Set the Document Code as the PayPal template
- Login as an Administrator.
- Navigate to 'Settings' --> 'Settings' (/zSettings.aspx).
- Click the 'Orders' tab.
- Click the 'Credit Cards' sub-tab.
- Locate the 'PayPal Template' setting.
- Using the drop down menu, select the document code you created (e.g. SandboxTest).
- To save, click the 'Update' button.
5. Update the Message Displayed to the Customer during Checkout
- Login as an Administrator.
- Navigate to 'Content' --> 'Resource Manager' (/zResourceMaintenance.aspx).
- Search for 'PayPalPaymentSummary'.
- Select the record via radio button.
- Click 'Modify'.
Copy the code snippet below and paste into the 'Resource Value' field.
Code Snippet<BR><table class='text'><tr><td><img src='https://www.paypalobjects.com/webstatic/mktg/logo/pp_cc_mark_37x23.jpg'></td><br><td>Please pay this transaction using your PayPal. Once your payment has been received, we will despatch your order.</td></tr></table>- Update the image source and message text if required.
- To save, click OK.
6. Update the Payment Option text Resource
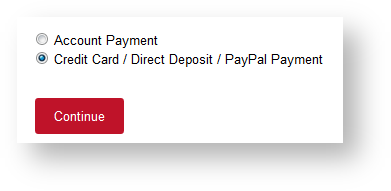
The final step before testing is to update the Resource Value, which displays the Payment options text. This lets customers know they can pay by Credit Card or PayPal.
- Login as an Administrator.
- Navigate to 'Content' --> 'Resource Manager' (/zResourceMaintenance.aspx).
- Search for 'rcPayByCardOrEft'.
- Select the record via radio button.
- Click 'Modify'.
- Update the 'Resource Value' field with "Credit Card / PayPal Payment" (or similar)
- Click 'OK' to save.
Related help


