Overview
Use this how-to guide to create and publish a basic article with out-of-the-box templates. Or use this to understand the key aspects of Article creation and maintenance.
1. Create Article Type
An 'article type' allows articles to be grouped together. It allows grouped articles to appear in an article list page. Article types are user-defined so you can add them to suit the purpose or function of your grouped pages. For example, you might have an article type called 'FAQs', or 'marketing blog posts', or 'news articles', etc. An article page must always belong to an article type. So before you create an article, the article type it falls under to must have been added.
To add an article type:
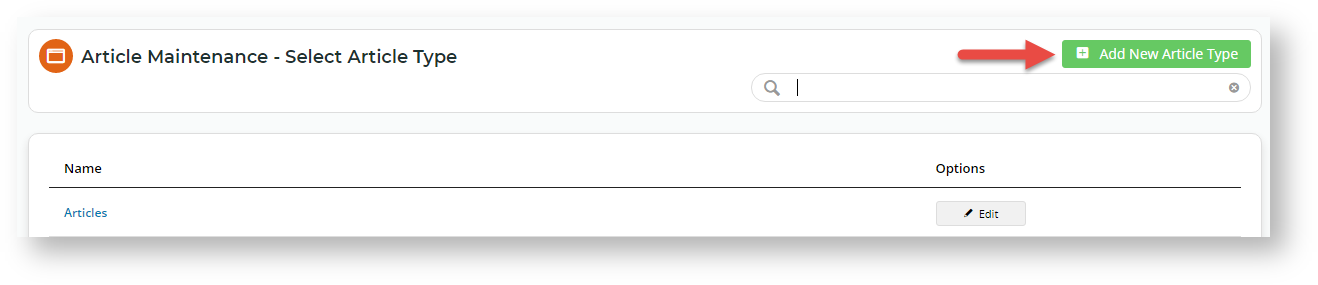
- In the CMS, navigate to Content → Articles.
- Any existing article types will be listed. To add a new article type, click the Add New Article Type button.
- In the Add Article Type screen, enter a Code for the FAQs article type. It must be one continuous string with no more than 10 characters.
- In Name, enter a suitable description. TIP - Remember, this name will be used to identity the article type, e.g., when selecting an article type to publish in an article list page.
- (Optional) In Icon, select a suitable icon. This is displayed only in the CMS.
- Click Save. Once the article type has been added, it appears in the article type list.

2. Create an Article
Once the Article Type you need is added, you can create articles for it. Here's how to create a basic article using the out-of-the-box template.
- In the CMS, navigate to Content → Articles.
- Click Edit for the Article Type you want to group the article in.
- Any existing articles in this article group are listed. Click the Add New Article button.
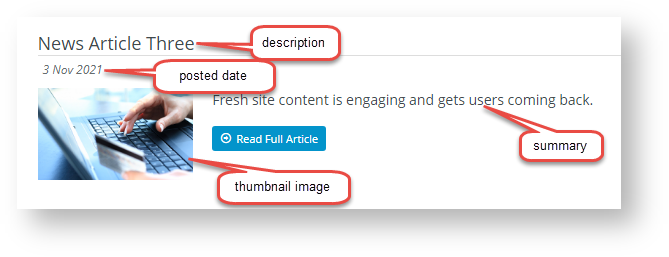
- In the Add Article screen, enter a Description for your article. NOTE - This will be the article's title. The article's SEO URL, Browser Page Title, and SEO Description will also be auto-populated what you enter here. You can change any of these fields if you wish.
- The Posted Date will auto-populate with today's date. If you wish, you can change it. This date will be displayed to readers in the article.
- If you want to set a date for this article to be visible on your website, enter a Start Date. NOTE - This date may be different from the Posted Date.
- If you want the article to be removed from your website on a certain date, enter an Expiry Date.
- Select or upload a thumbnail image for the article. This smaller image displays for the article in the article list page.
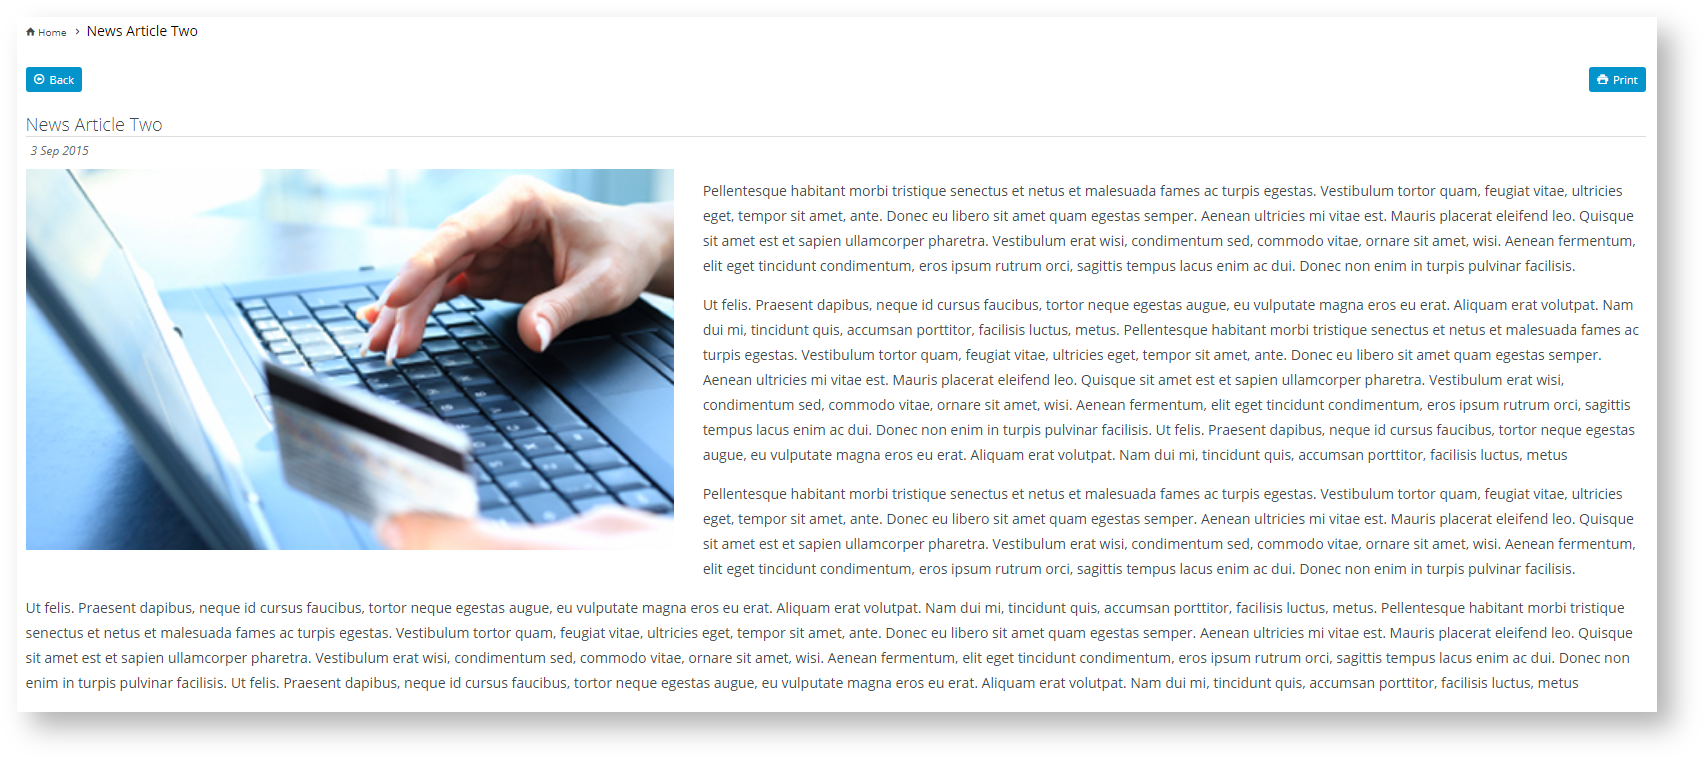
- Select or upload the main image for the article. This image displays in the article.
- Enter some 'teaser' text to engage readers in the Summary section. This is displayed in the article list page. Use the WYSIWYG editing tools to update font sizes, formats, and colours based on your site's style guide.
- In the Content section, enter the main body of the article. Use the WYSIWYG editing tools to update font sizes, formats, and colours based on your site's style guide.
- (The Article Filters panel appears only if your Administrator has enabled it.)
Article Filters allow an article to be viewed only by a certain segment of site users.
- Customer filters apply to user's current Customer only?: Applies only if filters are added in the Customer Codes field in 12ii. Some users are attached to more than one Customer account. If a Customer Code filter is added. the user can view the article when in this Customer account. What about whey they switch to another account not in the filter list? Toggle this setting ON if the user should not see the article anymore. If OFF, the user can view the article as long as one of their linked Customer accounts has been added to the list.
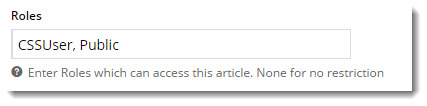
- Enter one or more Filter values: Customer Types, Customer Warehouses, Customer Codes, Bill to Customer Codes, Email Addresses or Roles. NOTE - If a field is left blank, no filters will apply at that level.
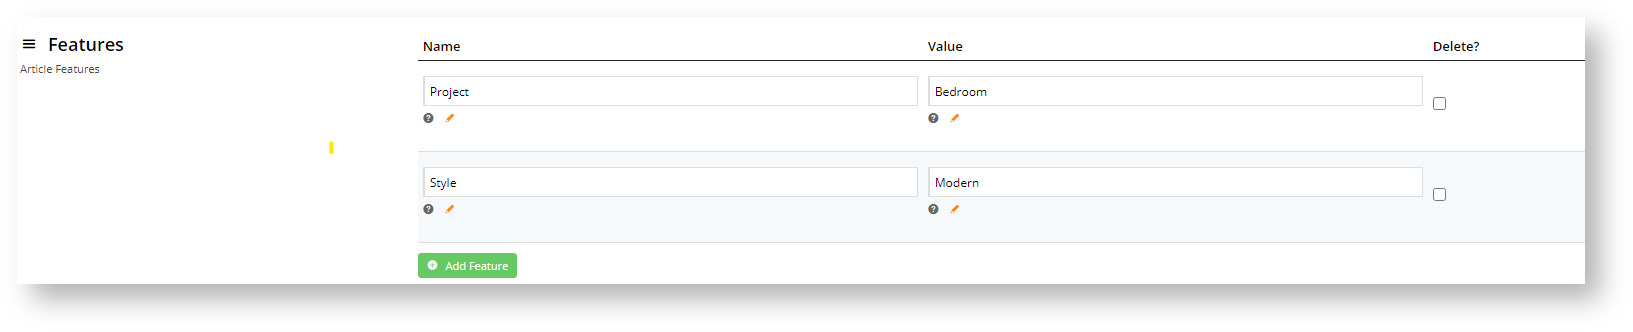
NOTE - This function works only with standard article widgets. It will not work if your site uses custom article widgets.- Features are metadata you define to tag articles of an article type. They can then be used to help readers quickly locate articles that are relevant. So features and feature values should be meaningful to an article's content. Think of a 'feature' as a category and its 'values' as subtypes of the category. As an example, suppose your business sells homewares and you and other article creators have published many articles on products and designs for different rooms. A 'feature' could be 'room type', and values, 'bathroom', 'bedroom', 'loungeroom', etc. Articles can be tagged with particular room type values. Using the room type filter, readers can quickly find articles about decorating a particular room type, e.g., 'bathroom' or 'bedroom'.
You can add as many features as you require.
In Feature, enter a name for the category. In Value, enter the subtype of this category. TIP - For the filters to display in an article list, see the how-to guide on Add a Feature Filter.
How site visitors use feature filters:
13. Once you have finished editing the article, click Save & Exit.


3. Format Article Layout
How parts of an article is arranged on the page depends on the template used. Like in other templates, content is rendered through widgets. While you can create custom article templates, the simplest option is to use the default article template. If you don't specify a template, this will be the layout of an article. You do not have to mess around with templates.
4. Format the Article List Page Layout
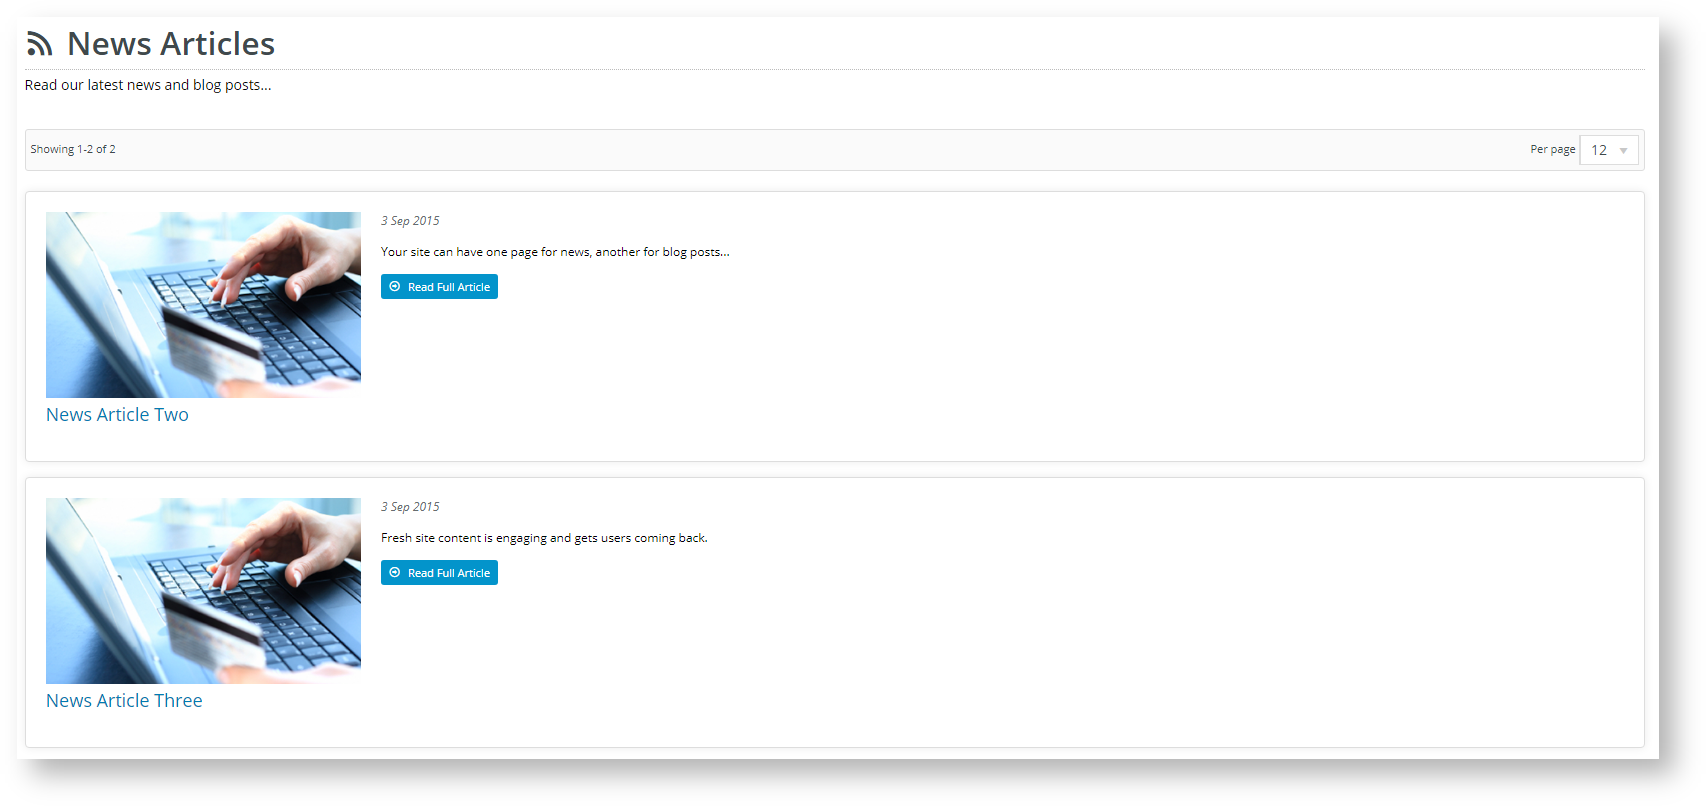
Now that the article has been created, we want to publish it (make it visible on your website). Unless an article is being promoted, site visitors usually click a link to view the list of articles that have been grouped together under an article type. This list is displayed on what we call an 'article list page'. Readers can scroll through the list and click on a link that takes them to each article's content. The layout of an article list page can also be formatted. But here, we will just use the default template that comes standard for your website. It looks like this:
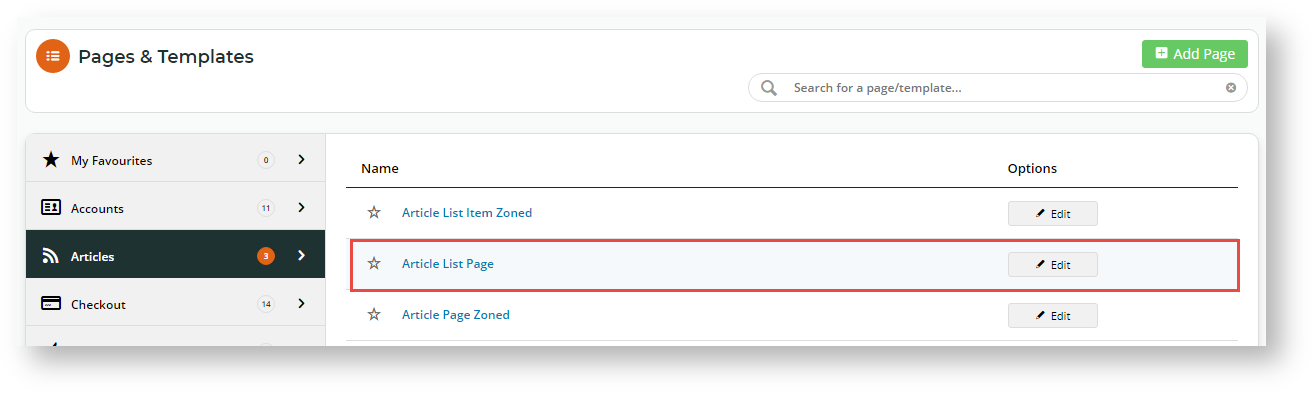
You can access it via Content → Pages & Templates → Articles → Article List Page. It will automatically be used if your site is not enabled for zoned article templates or if a customised one has not been nominated for article list pages.
If the zoned template setting is enabled, the article list page defaults to the Article List Item Zoned template. 
5. Add article list as menu item
To customise an article layout, the 'Use Zoned Article Template' setting must be enabled in Settings. Your website is supplied with a standard zoned article template - the Article Page Zoned template. This template defaults if zoned templates is used and no other templates have been selected for the article/article group.
Depending on your site's requirements and version, you can use customise article templates, edit them, or even override them and use custom article templates. For detailed help with these templates, see Article Templates help.
6. Add/edit Article Widgets
Each of the above templates uses various widgets to display the article content. For example, your article page zoned template might have the following widgets:
You can drag and drop these widgets to rearrange them into a different order, if you wish. Or if you want to get really creative, you can use the Layout Creator to customise the look and feel of this page completely.
To access any of these templates and configure the widgets in them,
- Navigate to Content → Pages & Templates → Articles.
- Click Design on the template you wish to update, then add / edit / remove widgets as required.
You can also add an Article List widget or an Article Slider widget to any custom page. In this case, the 'Article List Page' template would not be referenced.

Use Articles for FAQs
Want to use the Article system to display your FAQs with a toggle effect? Check out our 'How To' guide here.
Additional Information
| Minimum Version Requirements |
|
|---|---|
| Prerequisites |
|
| Self Configurable |
|
| Business Function |
|
| BPD Only? |
|
| B2B/B2C/Both |
|
| Ballpark Hours From CV (if opting for CV to complete self config component) |
|
| Ballpark Hours From CV (in addition to any self config required) |
|
| Third Party Costs |
|
Related help
Related widgets